BeyondERP.Newsletter
Menu

Setup step on the Electronic reporting source page · Organization administration

Set up Electronic reporting source

Use this page to let Electronic reporting import inbound files without anyone picking each file by hand.

Used by
Electronic reporting developer, Electronic reporting functional consultant
Business process
Administer system features
Menu item
ERImportFormatSource
Main table
ERImportFormatSourceTable
Setup steps
1 on this page
Show what matters for
SETUP GUIDEHow to set it up8 sections. Choose a role to highlight what matters to you.
Everyone

1What it is and why

What it isA setup page where you set, for each import format, the file sources, such as SharePoint folders, that Electronic reporting reads inbound files from.
What you do hereUse this page to let Electronic reporting import inbound files without anyone picking each file by hand.
ExampleFor example, Excel files of vendor transactions placed in a SharePoint folder can be imported automatically each time the import runs.
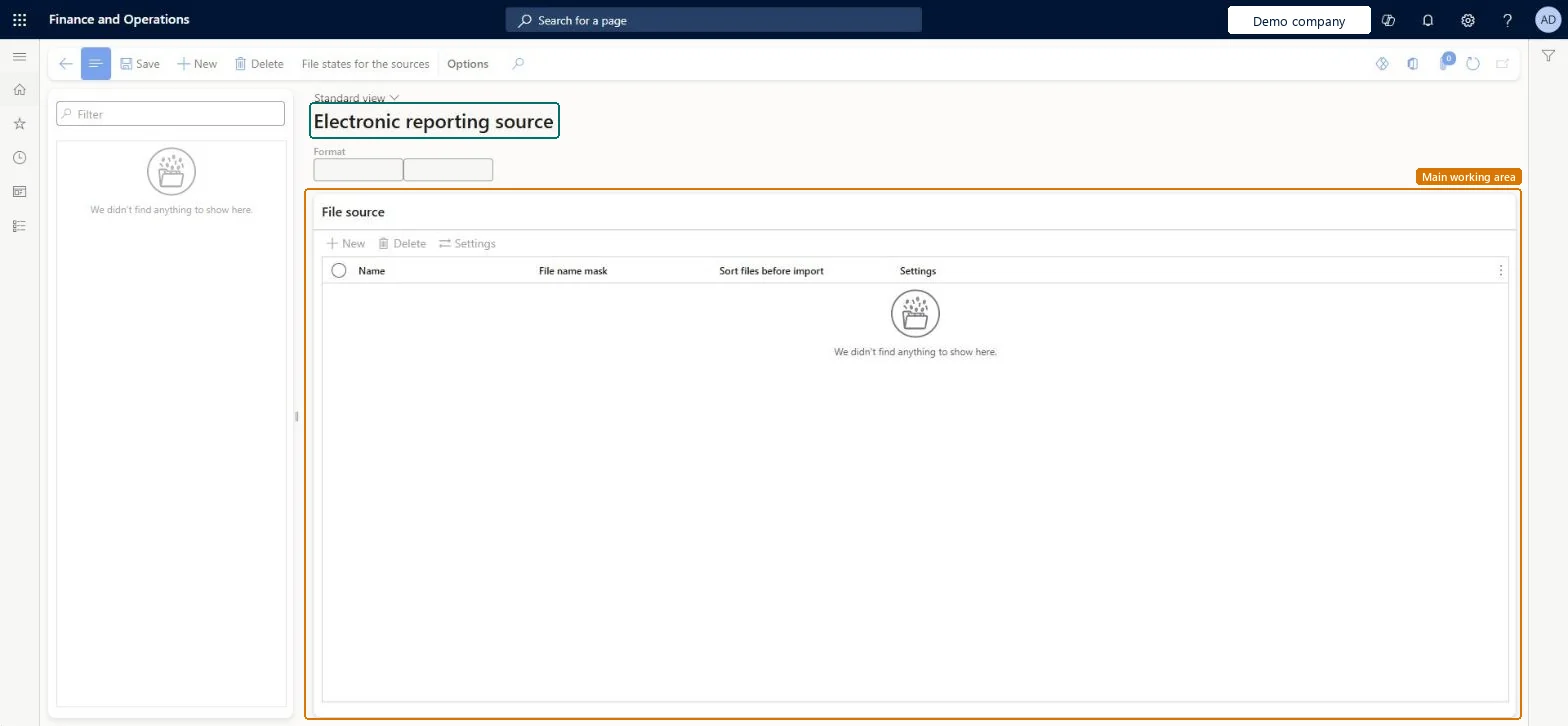
Electronic reporting source page in Dynamics 365
The page in Dynamics 365. page title tab to open what to set or check
Functional consultant · Solution architect

2Where it fits

Business processAdminister system features
Menu pathOrganization administration › Electronic reporting › Electronic reporting source
Set up firstConfigurations Microsoft Learn Set up Configurations
Used next byFile states for the sources Microsoft Learn
In this process Set up Document management parameters · Set up Address books
End user · Functional consultant

3How to do it

About the examples: Examples and screenshots in this guide use BEAT, a demo company in a Dynamics 365 test environment. Use your own company's codes and values instead of copying them.

Setup steps on this page

Set up Electronic reporting source

Use this page to let Electronic reporting import inbound files without anyone picking each file by hand.

Steps from Microsoft

  1. Go to Organization administration > Electronic reporting > Electronic reporting source.
  2. Select New.
  3. In the Format field, select the import format.
  4. On the File source FastTab, select New and enter a Name for the source.
  5. In the File name mask field, enter a mask, such as *.xlsx, if only some files should be imported.
  6. In the Sort files before import field, select the order in which files are imported.
  7. Select Settings and choose the folders to read files from.
  8. Select Save.

Source: Microsoft Learn

Fields on the page

FieldWhat it meansTable column
File name maskAn optional filter so that only matching files are imported; one mask per format.Microsoft Learn FileNameMask
Sort files before importThe order in which several waiting files are imported.Microsoft Learn FileSortingBeforeImport

Test checklist

  1. Create SharePoint document types for the source, archive and error folders on Document types.
  2. Add a source for the import format with a File name mask and the folders.
  3. Upload a valid file to the source folder and check it shows as Ready on File states for the sources.
  4. Run the model mapping and check the file moves to the archive folder and shows as Imported.

Source: Microsoft Learn

Functional consultant

4Setup decisions

Setup stepRecommended value and whyDecision, common mistake and test
Set up Electronic reporting sourcePer import format: a File name mask for the expected file type, plus separate SharePoint document types for the source, archive, warning and error folders.The mask limits imports to the right files, and separate folders show at a glance which files were imported, imported with warnings or failed.Not setting an error folder: a failed file stays in the source folder.
Solution architect

5Design impact

Can it be undoneOne-way: Warning: Deleting the source setting for a format also deletes, after you confirm, all file states linked to it, so their import history is lost.
If you change it laterDeleting a source setting for a format also deletes, after you confirm, all the file states linked to it. Microsoft Learn
Technical architect

6Technical

Menu itemERImportFormatSource Checked in Dynamics 365
FormERImportFormatSourceTable Checked in Dynamics 365
TableERImportFormatSourceTableShown as “Electronic reporting source” in Record infoChecked in Dynamics 365
Who can open itPrivilegesMaintain electronic reporting import format source ERImportFormatSourceMaintainDutiesConfigure electronic reporting import format source ERImportFormatSourceConfigure
2 security rolesElectronic reporting developer ERDeveloperElectronic reporting functional consultant ERFunctionalConsultant
Checked in Dynamics 365
Roles to set it up and use itTo set it up or change itElectronic reporting functional consultant ERFunctionalConsultantElectronic reporting developer ERDeveloperGive people one of these roles. On this system, 2 roles can open this page.Checked in Dynamics 365
Actions on the pageOptions: Personalize, Page options, Edit, ShareChecked in Dynamics 365
Developer

7Developer

Open it by URLhttps://<your-environment>/?mi=ERImportFormatSource
Everyone

8Sources

To cite this step: OA-ER-030, Set up Electronic reporting source. Beyond ERP Atlas Hub, 2026-11-11. https://www.beyonderp.cloud/atlas/step/OA-ER-030