Setup step on the Inventory locations page · Inventory management
Set up Inventory locations
Use this page to describe each location's coordinates, size and type, so that pick routes, counting and other decisions can be based on where items are stored.
Define warehouse locations in Dynamics 365 Supply Chain Management
Menu item
WMSLocation
Main table
WMSLocation
Data entity
WMSWarehouseLocationEntity
Setup steps
1 on this page
Show what matters for
SETUP GUIDEHow to set it up8 sections. Choose a role to highlight what matters to you.
Everyone
1What it is and why
What it is
A setup page where you define the locations where items are stored and picked in warehouses that don't use warehouse management processes.
What you do here
Use this page to describe each location's coordinates, size and type, so that pick routes, counting and other decisions can be based on where items are stored.
Example
For example, the location name 01-02-03-4 stands for aisle 1, rack 2, shelf 3 and bin 4.
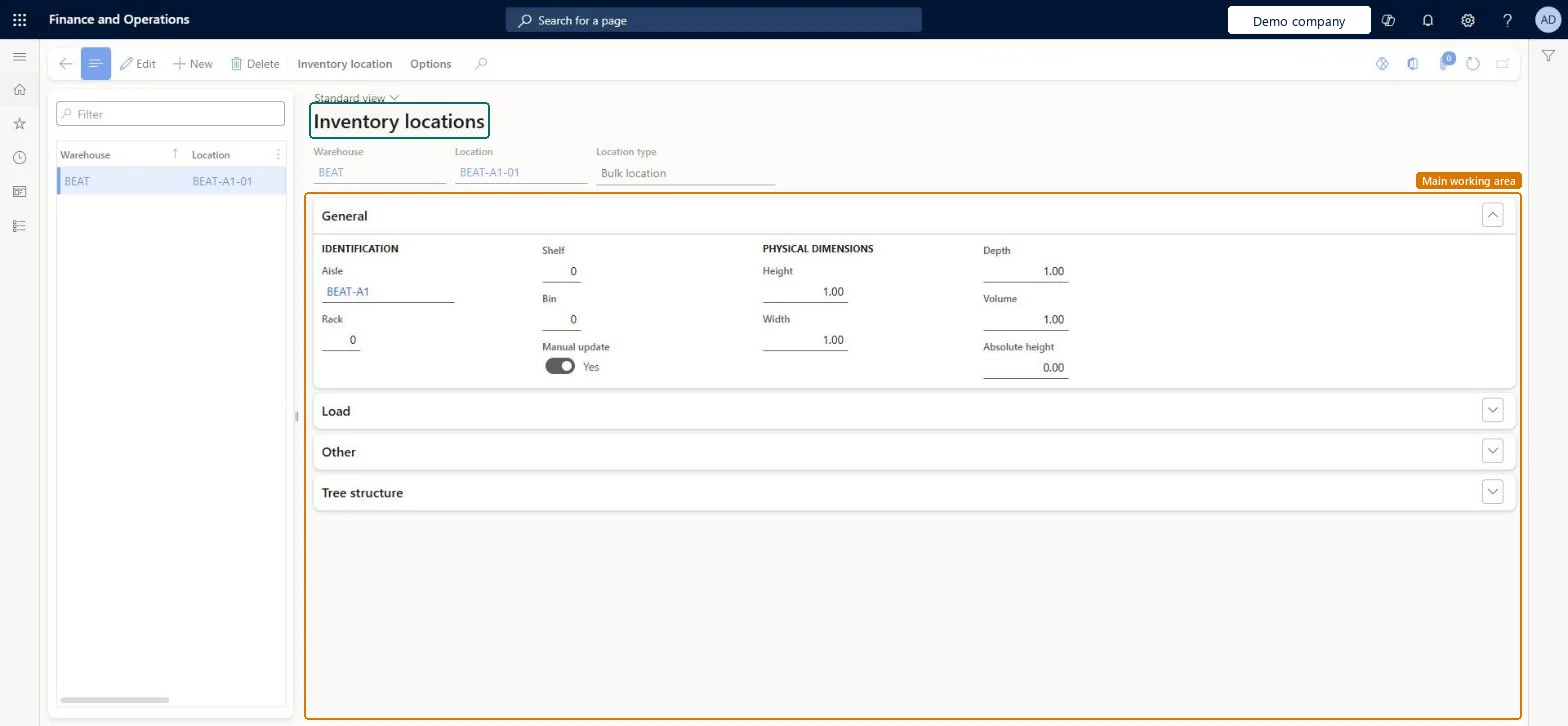
The page in Dynamics 365. page title tab to open what to set or check
About the examples: Examples and screenshots in this guide use BEAT, a demo company in a Dynamics 365 test environment. Use your own company's codes and values instead of copying them.
Setup steps on this page
Set up Inventory locations
Use this page to describe each location's coordinates, size and type, so that pick routes, counting and other decisions can be based on where items are stored.
How to use it
Go to Inventory management > Setup > Inventory breakdown > Inventory locations.
Select New to add a location.
Enter the Warehouse, Location and Location type.
On the General tab, fill in the Aisle, Rack, Shelf and Bin, and the Height, Width, Depth, Volume and Absolute height.
Expand Load, Other and Tree structure to review those sections.
Select Save.
Source: Checked in Dynamics 365
Fields on the page
Field
What it means
Table column
Location type
The kind of location, such as bulk, picking, inbound dock, outbound dock or inspection.Microsoft Learn
locationType
Check text
Text used to confirm that the operator chose the right location for an item.Microsoft Learn
checkText
Input area
Groups locations where received items are placed.Microsoft Learn
Picking area
Groups locations whose items should be picked together or by one person.Microsoft Learn
Input blocked
Blocks the location for receipts, using a blocking cause.Microsoft Learn
inputBlockingCauseId
Test checklist
Create locations for a non-WMS warehouse from aisle, rack, shelf and bin, with location types such as Bulk location and Picking location.
Set the item's Picking location on Warehouse items.
Receive stock to a bulk location and move part to the picking location.
Set Input blocked on a location and check it can't be used for receipt.
Name locations from their coordinates (aisle-rack-shelf-bin), for warehouses that don't use warehouse management processesLearn describes the location name as usually built from warehouse, aisle, rack, shelf and bin, and this page applies only to non-WMS warehouses.
Expecting more than one picking location per item in a warehouse: an item can have only one picking location in each warehouse.
Reversible: Location attributes such as type, size and blocking can be changed; they affect later picking routes and counting.
Technical architect
6Technical
Menu item
WMSLocationChecked in Dynamics 365
Form
WMSLocationChecked in Dynamics 365
Table
WMSLocationShown as “Locations” in Record infoKey field: inventLocationId, aisleId, rack, level, position, manualName, wMSLocationIdChecked in Dynamics 365
To set it up or change itWarehouse manager WMSWarehouseManagerProcess engineer RouteProcessEngineerTo use itQuality control manager InventQualityControlManagerMaterials manager InventMaterialsManagerQuality control clerk InventQualityControlClerkProduction supervisor ProdProductionSupervisorShipping clerk InventShippingClerkGive people one of these roles. On this system, 12 roles can open this page.Checked in Dynamics 365
WMSWarehouseLocationEntity (Warehouse locations): loaded for each company, in Microsoft's default template 300 - Inventory.Load order: Microsoft's default template 300 - Inventory loads Warehouse locations at execution unit 1, level 300, sequence 70. Lower levels load first, and entities at the same level load in sequence order.Load first: Cause of blocking, Warehouse zones, Warehouses, Inventory aisle, Warehouse location profiles, the default templates at lower levels (System setup to Budgeting)Microsoft Learn