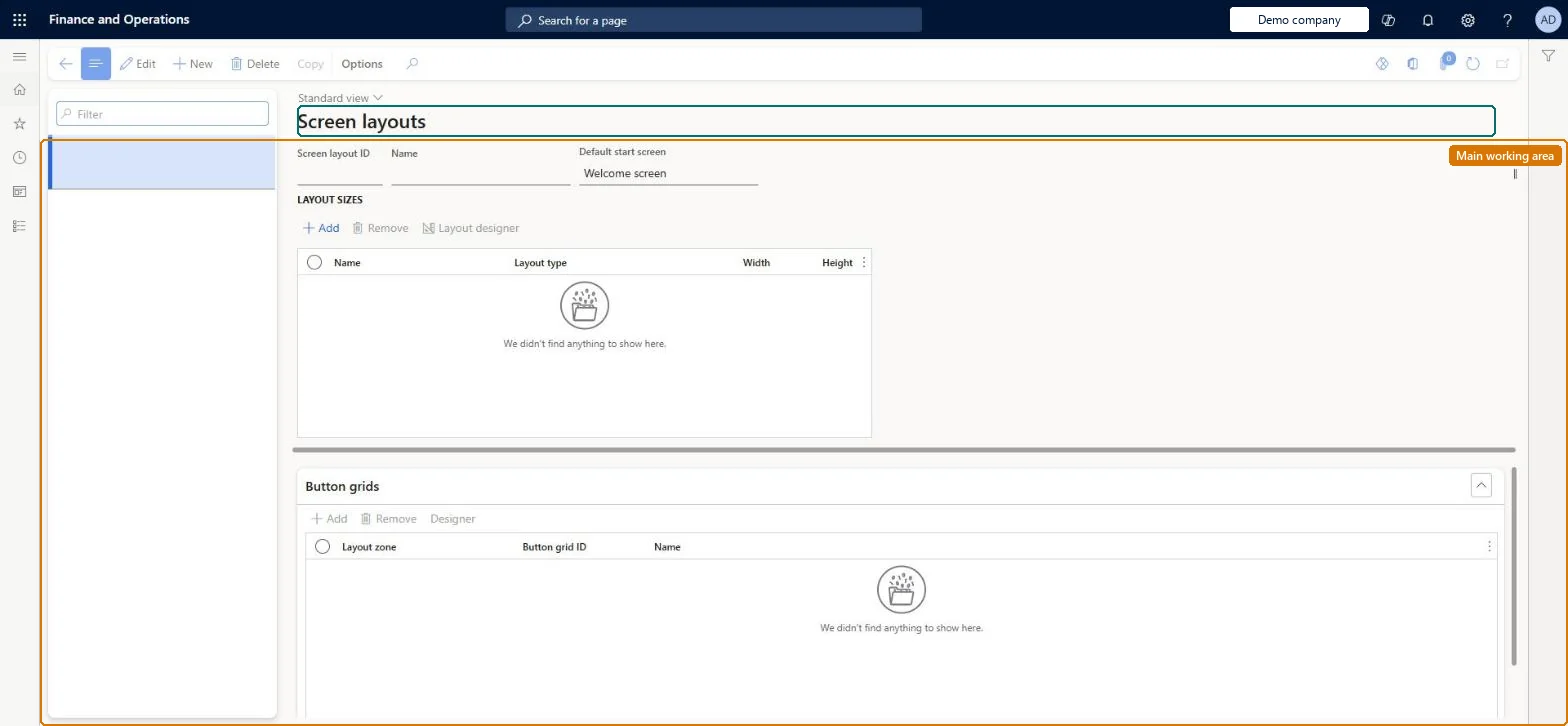
Setup step on the Screen layouts page · Retail and Commerce
Set up Screen layouts
Use this page to create a layout, add the layout sizes it must support, open the screen layout designer to place button grids, number pad, totals, receipt panel and other controls, set the default start screen, and then assign the layout to stores, registers or users.
Retail operations manager, Retail service, Information technology manager
Business process
Manage sales channels
Menu item
RetailTillLayout
Main table
RetailTillLayout
Data entity
RetailTillLayoutEntity
Setup steps
1 on this page
Show what matters for
SETUP GUIDEHow to set it up8 sections. Choose a role to highlight what matters to you.
Everyone
1What it is and why
What it is
A setup page where you define POS screen layouts: the actions, content and placement of controls on the Welcome and Transaction screens, for each layout size and orientation.
What you do here
Use this page to create a layout, add the layout sizes it must support, open the screen layout designer to place button grids, number pad, totals, receipt panel and other controls, set the default start screen, and then assign the layout to stores, registers or users.
Example
For example, where every cashier uses the same layout regardless of register you assign the screen layout only at the store level.
The page in Dynamics 365. page title tab to open what to set or check
About the examples: Examples and screenshots in this guide use BEAT, a demo company in a Dynamics 365 test environment. Use your own company's codes and values instead of copying them.
Setup steps on this page
Set up Screen layouts
Use this page to create a layout, add the layout sizes it must support, open the screen layout designer to place button grids, number pad, totals, receipt panel and other controls, set the default start screen, and then assign the layout to stores, registers or users.
Steps from Microsoft
Go to Retail and Commerce > Channel setup > POS setup > POS > Screen layouts.
Select New to create a screen layout, or select an existing one.
Enter the ID and name for the screen layout.
On the Layout sizes FastTab, select Add and in the Name field select the POS screen resolution.
Select Layout designer, install the designer host if prompted, and sign in.
Drag controls (button grids, number pad, totals panel, receipt panel, customer card) onto the layout and configure them; close the designer and save.
Assign the layout to the store, register or worker.
Run the Registers (1090) job, and 1070 or 1060 depending on the assignment level.
Assign the layout at store level, and use register or user assignments only where a till or role needs a specialised layout; configure the layout for every layout size the store's devices useUser assignment overrides register, and register overrides store; when everyone uses the same layout, store level is enough. Learn says a screen layout must be configured for each layout size the POS uses.
Designing only one layout size. Devices with another resolution pick the closest configured size and can show a poorly fitting screen.
Solution architect
5Design impact
Can it be undone
Reversible: Layouts can be changed and re-assigned; changes apply after jobs 1070, 1090 or 1060 depending on assignment level.
If you change it later
A layout must be configured for every layout size the POS uses, and changes reach the POS only after the relevant distribution jobs run. Microsoft Learn
Technical architect
6Technical
Menu item
RetailTillLayoutChecked in Dynamics 365
Form
RetailTillLayoutChecked in Dynamics 365
Table
RetailTillLayoutShown as “SCREEN LAYOUT” in Record infoChecked in Dynamics 365
PrivilegesMaintain retail POS till layout RetailPOSTillLayoutMaintianDutiesMaintain retail register reference data RetailTerminalReferenceDataMaintain3 security rolesRetail operations manager RetailOperationsManagerRetail service RetailServiceInformation technology manager SysServerITManagerChecked in Dynamics 365
Roles to set it up and use it
To set it up or change itRetail service RetailServiceRetail operations manager RetailOperationsManagerInformation technology manager SysServerITManagerGive people one of these roles. On this system, 3 roles can open this page.Checked in Dynamics 365
Actions on the page
(Action Pane without tabs): CopyChecked in Dynamics 365