Setup step on the Info codes page · Retail and Commerce
Set up Info codes
Use this page to create each info code, its prompt text, input type and options, and link it to other info codes or info code groups; the codes are then attached to store actions, products, payment methods or customers.
Product designer, Retail operations manager, Retail service
Business process
Manage sales channels
Menu item
RetailInfocodeTable
Main table
RetailInfocode
Data entity
RetailInfocodeEntity
Setup steps
1 on this page
Show what matters for
SETUP GUIDEHow to set it up8 sections. Choose a role to highlight what matters to you.
Everyone
1What it is and why
What it is
A setup page where you define info codes: prompts that make the cashier enter or choose information at the POS register during actions such as sales, returns or customer selection.
What you do here
Use this page to create each info code, its prompt text, input type and options, and link it to other info codes or info code groups; the codes are then attached to store actions, products, payment methods or customers.
Example
For example, when a customer returns a product the cashier can be prompted for the reason and pick it from a list of subcodes.
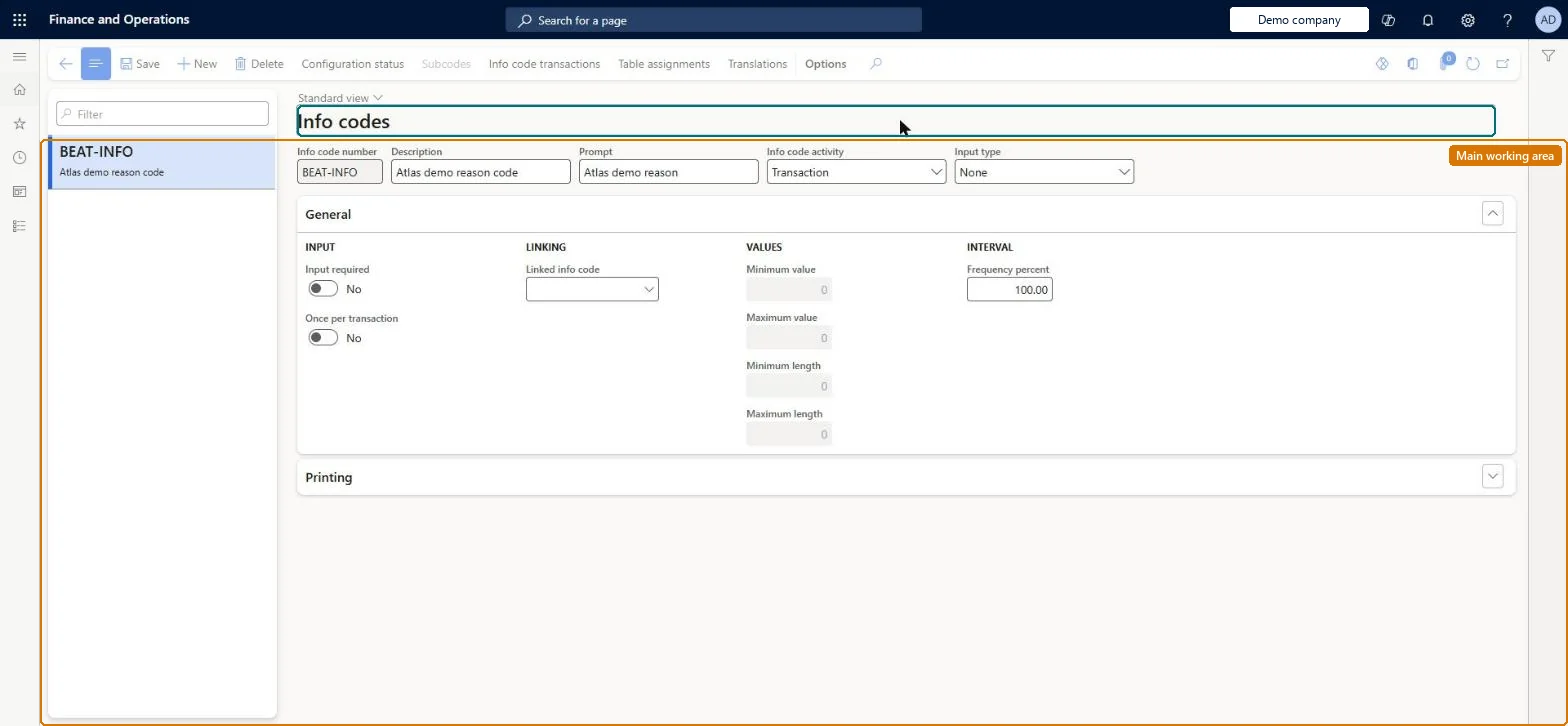
The page in Dynamics 365. page title tab to open what to set or check
About the examples: Examples and screenshots in this guide use BEAT, a demo company in a Dynamics 365 test environment. Use your own company's codes and values instead of copying them.
Setup steps on this page
Set up Info codes
Use this page to create each info code, its prompt text, input type and options, and link it to other info codes or info code groups; the codes are then attached to store actions, products, payment methods or customers.
Steps from Microsoft
Go to Retail and Commerce > Channel setup > Info codes.
Select New to create a new info code.
Enter the info code number and a description.
In the Prompt field, enter the text shown to the cashier at the POS.
In the Input type field, select the kind of answer the cashier must give.
On the General FastTab, set Input, Linked info code, Values and Frequency percent as needed.
On the Printing FastTab, choose what is printed on the receipt, then save.
Small, single-purpose info codes (for example return reason with subcodes) that are reused through info code groups, rather than one linked info code chain per scenarioInfo codes in groups have no fixed dependencies, so the same code can be reused in several groups and ordered by priority. Linked chains need every variation set up separately.
Building a separate linked info code for every product scenario. The set-up multiplies and each variation has to be maintained on its own.
Solution architect
5Design impact
Can it be undone
Reversible: Prompts, input types and subcodes can be edited; the change applies to prompts raised after the channel is updated.
Technical architect
6Technical
Menu item
RetailInfocodeTableChecked in Dynamics 365
Form
RetailInfocodeTableChecked in Dynamics 365
Table
RetailInfocodeShown as “INFO CODES” in Record infoKey field: infocodeIdChecked in Dynamics 365
PrivilegesMaintain retail infocodes RetailInfocodesMaintainMaintain retail POS infocodes RetailPOSInfocodesMaintainDutiesMaintain retail infocodes RetailInfocodesMaintainMaintain retail reference data RetailReferenceDataMaintain3 security rolesProduct designer BOMProductDesignerRetail operations manager RetailOperationsManagerRetail service RetailServiceChecked in Dynamics 365
Roles to set it up and use it
To set it up or change itRetail service RetailServiceRetail operations manager RetailOperationsManagerProduct designer BOMProductDesignerGive people one of these roles. On this system, 3 roles can open this page.Checked in Dynamics 365
Actions on the page
(Action Pane without tabs): Configuration status, Subcodes, Info code transactions, Table assignments, TranslationsChecked in Dynamics 365
RetailInfocodeEntity (Info codes): loaded for each company, in Microsoft's default template 500 - Retail.Load order: Microsoft's default template 500 - Retail loads Info codes at execution unit 1, level 30, sequence 10. Lower levels load first, and entities at the same level load in sequence order.Load first: the default templates at lower levels (System setup to General ledger)Microsoft Learn