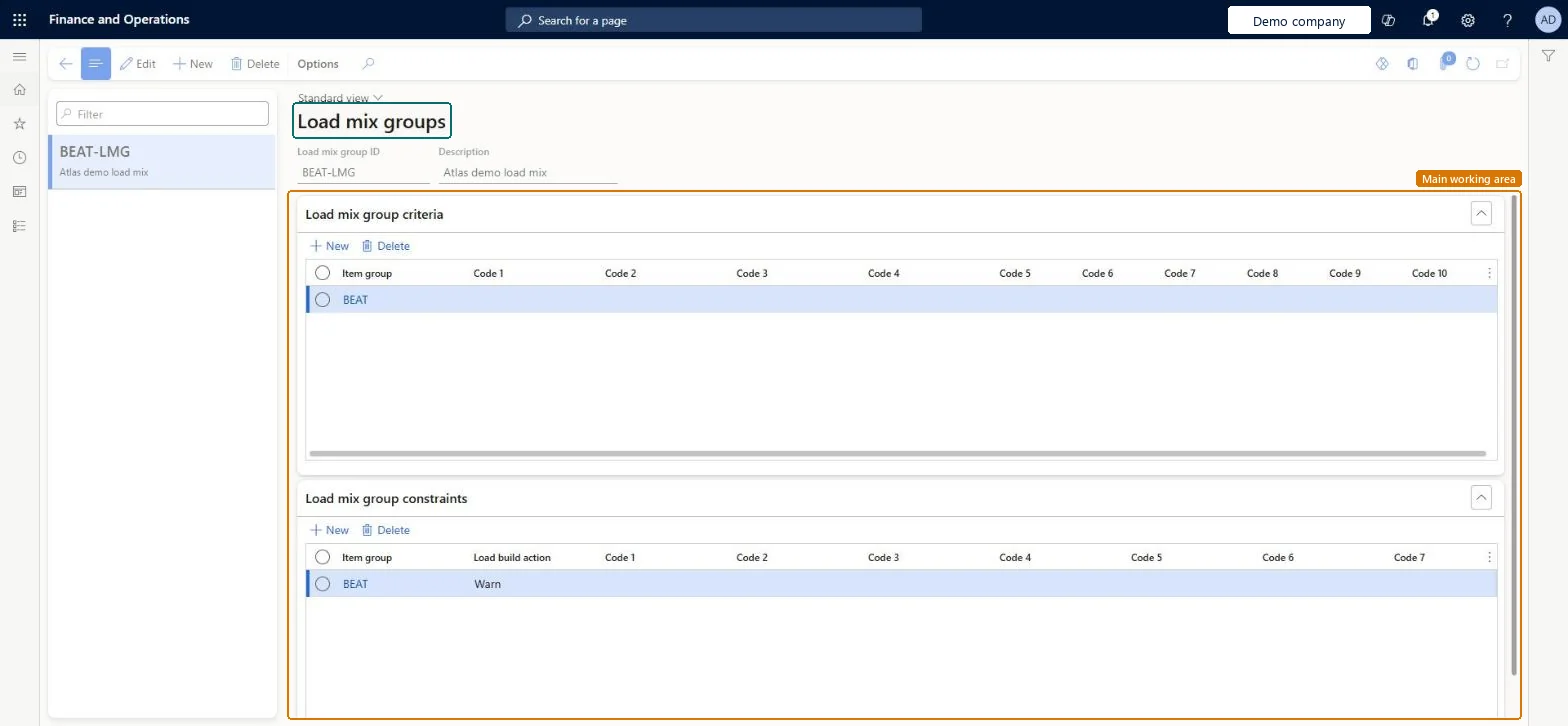
About the examples: Examples and screenshots in this guide use BEAT, a demo company in a Dynamics 365 test environment. Use your own company's codes and values instead of copying them.
Setup steps on this page
Set up Load mix groups
Use this page to set which item groups are considered for a load mix and which item groups are restricted from the same load.
Steps from Microsoft
Go to Warehouse management > Setup > Load > Load mix groups.
Select New on the Action Pane to create a load mix group.
In the Load mix group ID field, enter a name for the new group.
Select Save to make the Load mix group criteria FastTab available.
On the Load mix group criteria FastTab, select New and set the item groups that are considered for the load mix.
Select Save, then add rows on the Load mix group constraints FastTab to restrict item groups from the same load.
One load mix group per family of goods, with Load mix group criteria for the item groups it covers and constraints (Restrict) for item groups that must not travel with themLoad mix groups define which items can and can't be combined on one load, and advanced wave load building needs at least one.
Leaving the load mix group off the load build template, so restricted items are added to the same load.
PrivilegesMaintain load mix groups WHSLoadMixGroupMaintainView load mix groups WHSLoadMixGroupViewDutiesMaintain load planning WHSLoadPlanningMaintainInquire into load planning progress WHSLoadPlanningProgressInquire4 security rolesLogistics manager TMSLogisticsManagerTransportation coordinator TMSTransportationCoordinatorWarehouse planner WHSWarehousePlannerWarehouse manager WMSWarehouseManagerChecked in Dynamics 365
Roles to set it up and use it
To set it up or change itTransportation coordinator TMSTransportationCoordinatorTo use itWarehouse planner WHSWarehousePlannerWarehouse manager WMSWarehouseManagerLogistics manager TMSLogisticsManagerGive people one of these roles. On this system, 4 roles can open this page.Checked in Dynamics 365