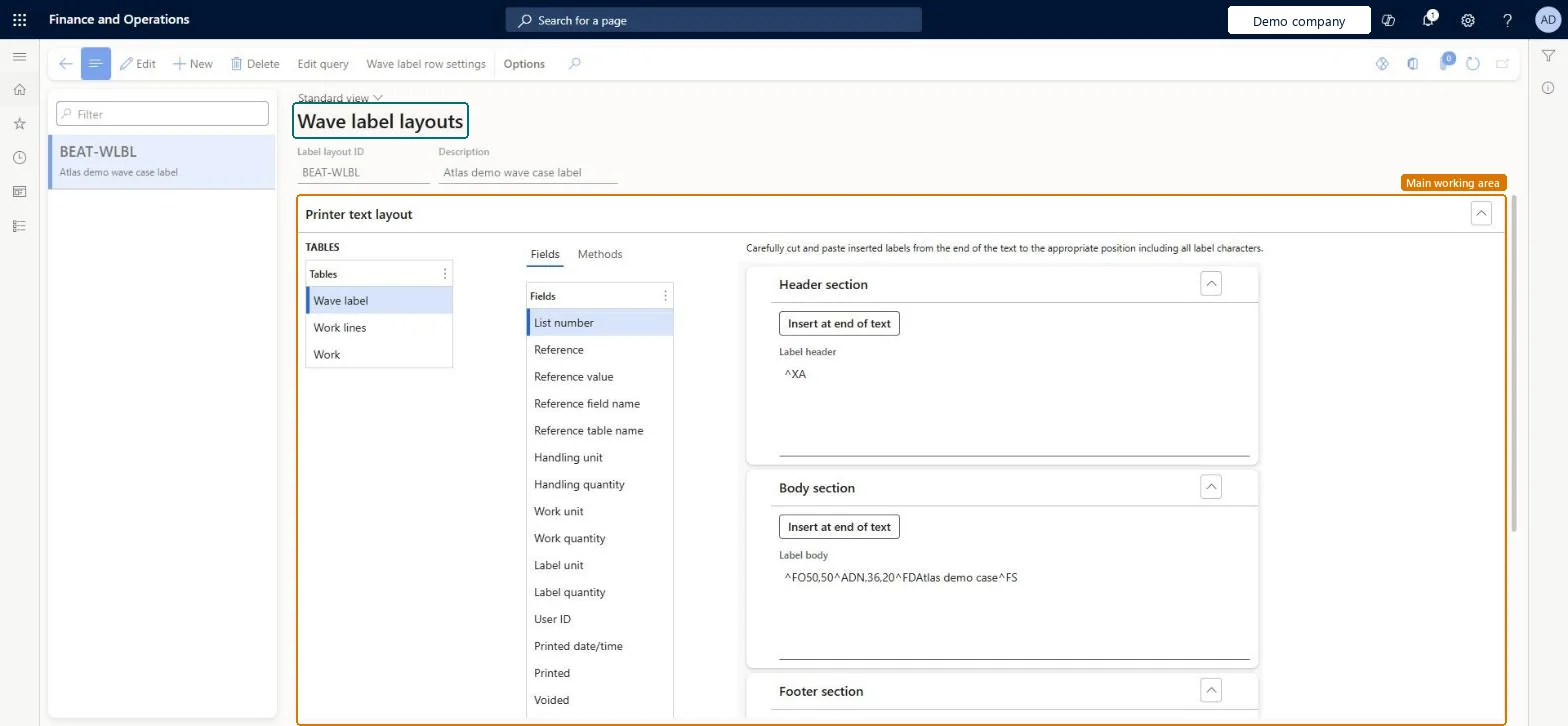
About the examples: Examples and screenshots in this guide use BEAT, a demo company in a Dynamics 365 test environment. Use your own company's codes and values instead of copying them.
Setup steps on this page
Set up Wave label layouts
Use this page to design the layout of wave labels, including the printer code for the header, body and footer sections.
Steps from Microsoft
Go to Warehouse management > Setup > Document routing > Wave label layouts.
Select New and enter a Label layout ID and a Description.
Select Wave label row settings and add a row with the Row Id, Row table name, Row start position, Row height and Rows per page.
Select Edit query to set which records print on the label.
In the Printer text layout section, enter the printer code for the Header section, the Body section and the Footer section.
A layout query with a range of Work type = Pick on Work lines, and Wave label row settings that point to WHSWaveLabel (one label per wave label record) or WHSWorkLine (several lines per label)The Pick range stops put lines from printing, and the row table decides whether you get one label per carton or a list of work lines per label.
Expecting several copies per label without changing the footer: ^PQ1 prints one copy, so set ^PQn to the number of copies you need.
To set it up or change itWarehouse manager WMSWarehouseManagerProcess engineer RouteProcessEngineerTo use itWarehouse planner WHSWarehousePlannerProduction supervisor ProdProductionSupervisorProcess engineering manager RouteProcessEngineeringManagerField Service Integration User FieldServiceIntegrationUserGive people one of these roles. On this system, 6 roles can open this page.Checked in Dynamics 365
Actions on the page
(Action Pane without tabs): Edit query, Wave label row settingsChecked in Dynamics 365