Auditor, Collections agent, Collections manager and 5 more roles
Business process
Define customer classifications in Dynamics 365 Supply Chain Management
Menu item
CustClassificationGroup
Main table
CustClassificationGroup
Data entity
CustomerPriorityClassificationGroupEntity
Setup steps
1 on this page
Show what matters for
SETUP GUIDEHow to set it up8 sections. Choose a role to highlight what matters to you.
Everyone
1What it is and why
What it is
A setup page where you create customer classification groups that rank customers by priority.
What you do here
Use this page to prioritize customers, for example to filter and sort sales orders when releasing them for picking.
Example
For example, BEAT ranks customers KEY, STANDARD and OCCASIONAL. When only 400 cases of BEAT-ITEM-001 are left for 650 cases ordered, it releases for picking only the orders of its 9 KEY customers first.
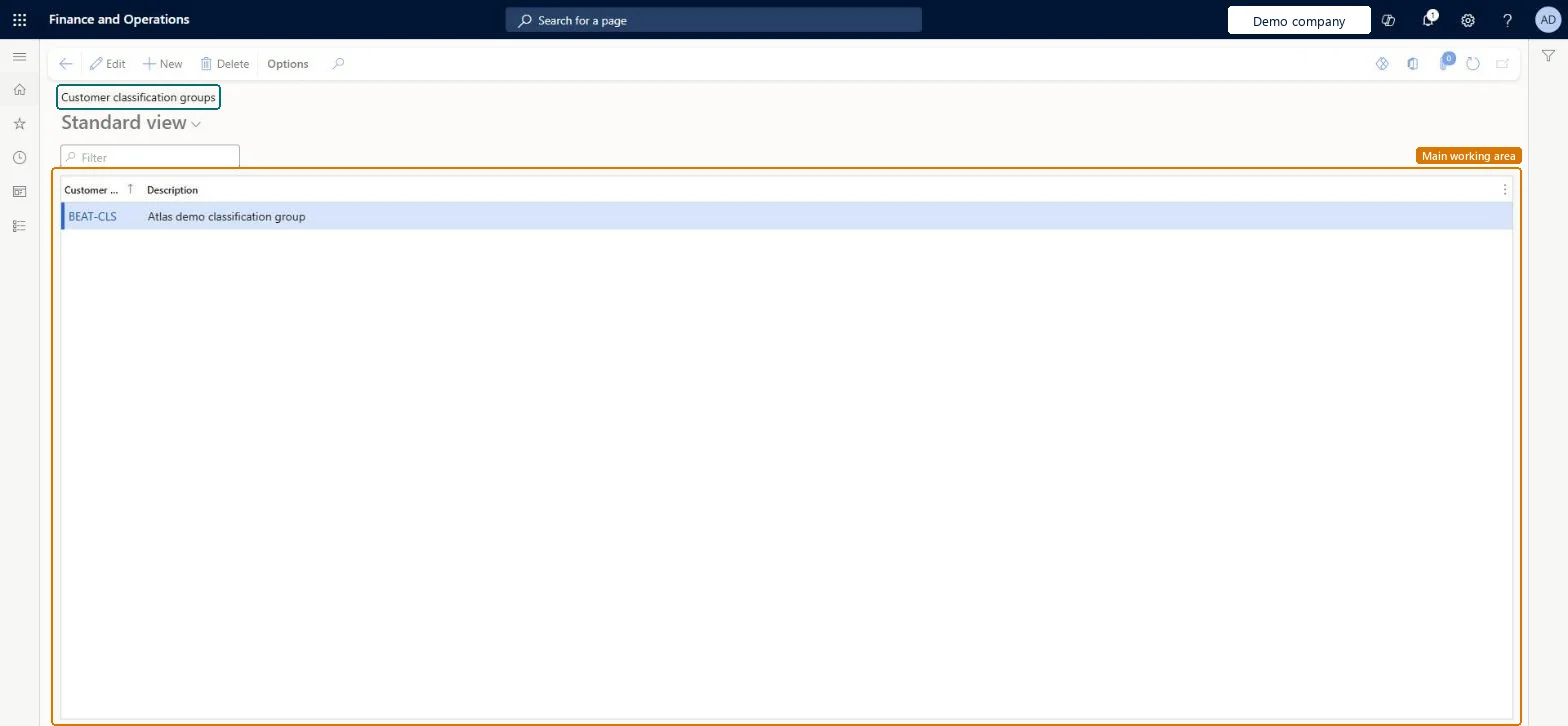
The page in Dynamics 365. page title tab to open what to set or check
About the examples: Examples and screenshots in this guide use BEAT, a demo company in a Dynamics 365 test environment. Use your own company's codes and values instead of copying them.
Step by step, with screenshots
Set up Customer classification groups1 screen
Use this page to prioritize customers, for example to filter and sort sales orders when releasing them for picking.
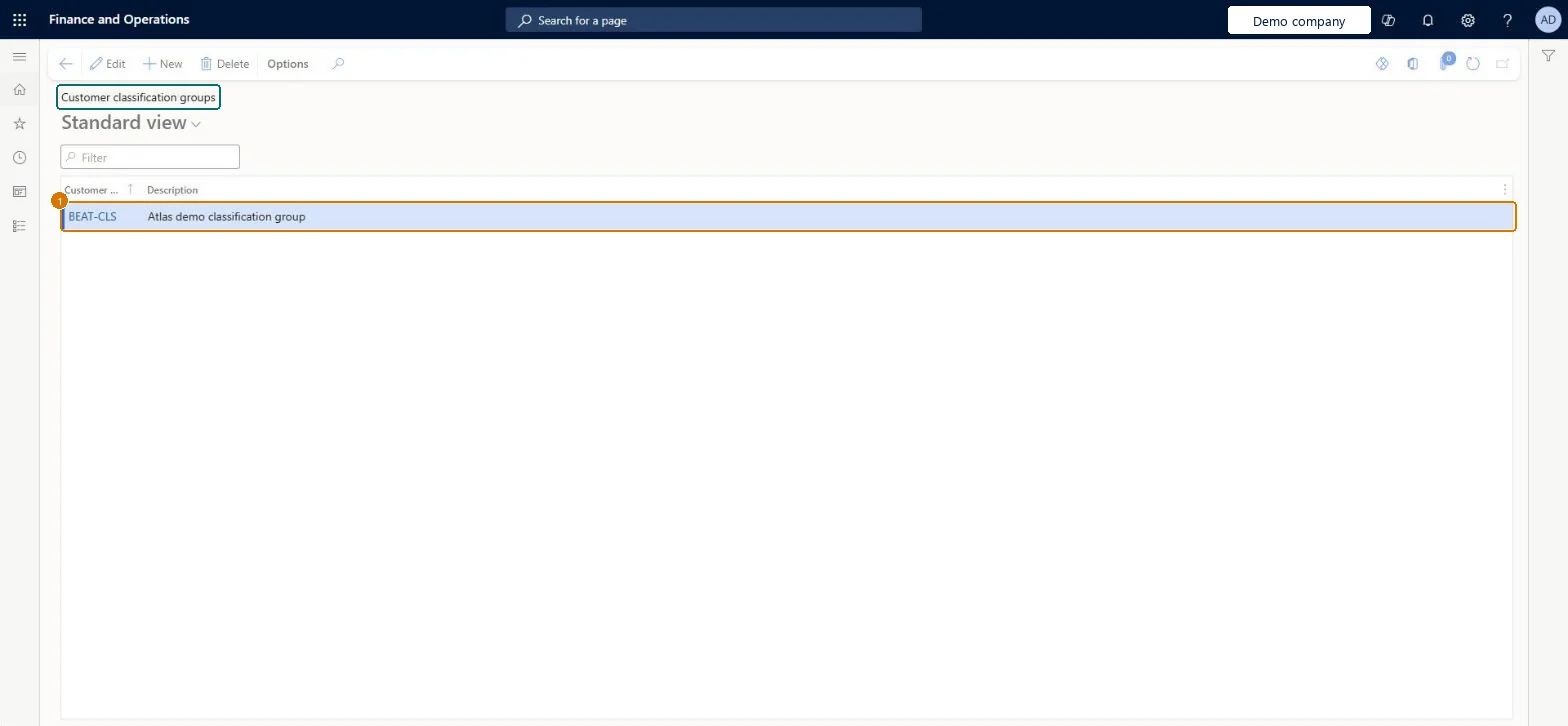
Screen 1
Create a customer classification group
Go to Sales and marketing > Setup > Customers > Customer classification groups
Select New
Enter the group code and description
Select Save
Assign the group to customers on the customer record
1Customer classification group
BEAT-CLS
Description
Classification group
Show the full screen page title tab to open what to set or check
Steps from Microsoft
Go to Sales and marketing > Setup > Customers > Customer classification groups.
Select New and enter the Customer classification group, for example KEY.
Enter a Description that says the priority, such as Key accounts, served first.
Set the classification group on each customer.
On Release sales order picking, filter or sort the orders on the customer classification.
Three or four ranked groups (for example KEY, STANDARD, OCCASIONAL) that the warehouse uses as a filter when stock is short.Customer classification groups prioritize customers, and Release sales order picking can filter and sort orders on them, so only a short ranked list is useful there.
On the live system, Sales manager, Accounts receivable manager and Collections manager can maintain this page, and Accounts receivable clerk, Accounting manager, Collections agent, Auditor and Chief financial officer can use it.
Reversible: Groups can be changed at any time; released orders aren't affected.
If you change it later
The classification only drives filtering and sorting when orders are released for picking; it doesn't change prices or credit. Microsoft Learn
Technical architect
6Technical
Menu item
CustClassificationGroupChecked in Dynamics 365
Form
CustClassificationGroupChecked in Dynamics 365
Table
CustClassificationGroupShown as “Customer classification groups” in Record infoKey field: CodeChecked in Dynamics 365
Data entities
CustomerPriorityClassificationGroupEntityCustomer classification groups Microsoft data model
Who can open it
PrivilegesMaintain customer classification groups CustClassificationGroupMaintainView customer classification groups CustClassificationGroupViewDutiesEnable customer process CustCustomerProcessEnableInquire into customer reference data CustCustomerReferenceDataInquire8 security rolesAuditor AuditPolicyManagerCollections agent CollectionLetterCollectionsAgentCollections manager CollectionLetterCollectionsManagerChief financial officer CompanyChiefFinancialOfficerAccounts receivable clerk CustInvoiceAccountsReceivableClerkAccounts receivable manager CustInvoiceAccountsReceivableManagerAccounting manager LedgerAccountingManagerSales manager TradeSalesManagerChecked in Dynamics 365
Roles to set it up and use it
To set it up or change itSales manager TradeSalesManagerAccounts receivable manager CustInvoiceAccountsReceivableManagerCollections manager CollectionLetterCollectionsManagerTo use itAccounts receivable clerk CustInvoiceAccountsReceivableClerkAccounting manager LedgerAccountingManagerCollections agent CollectionLetterCollectionsAgentAuditor AuditPolicyManagerChief financial officer CompanyChiefFinancialOfficerGive people one of these roles. On this system, 8 roles can open this page.Checked in Dynamics 365
Actions on the page
Options: Personalize, Page options, ShareChecked in Dynamics 365
CustomerPriorityClassificationGroupEntity (Customer classification groups): loaded for each company, in Microsoft's default template 330 - Sales and marketing.Load order: Microsoft's default template 330 - Sales and marketing loads Customer classification groups at execution unit 1, level 30, sequence 10. Lower levels load first, and entities at the same level load in sequence order.Load first: the default templates at lower levels (System setup to General ledger)Microsoft Learn
Checked in a working Dynamics 365 system, version 10.0.49: the menu item, form, table and security, the page, the demo records and the values in the screenshots.
To cite this step: SM-SETUP-420, Set up Customer classification groups. Beyond ERP Atlas Hub, 2026-11-11. https://www.beyonderp.cloud/atlas/step/SM-SETUP-420