BeyondERP.Newsletter
Menu

Setup step on the Address and contact information purpose page · Organization administration

Set up Address and contact information purpose

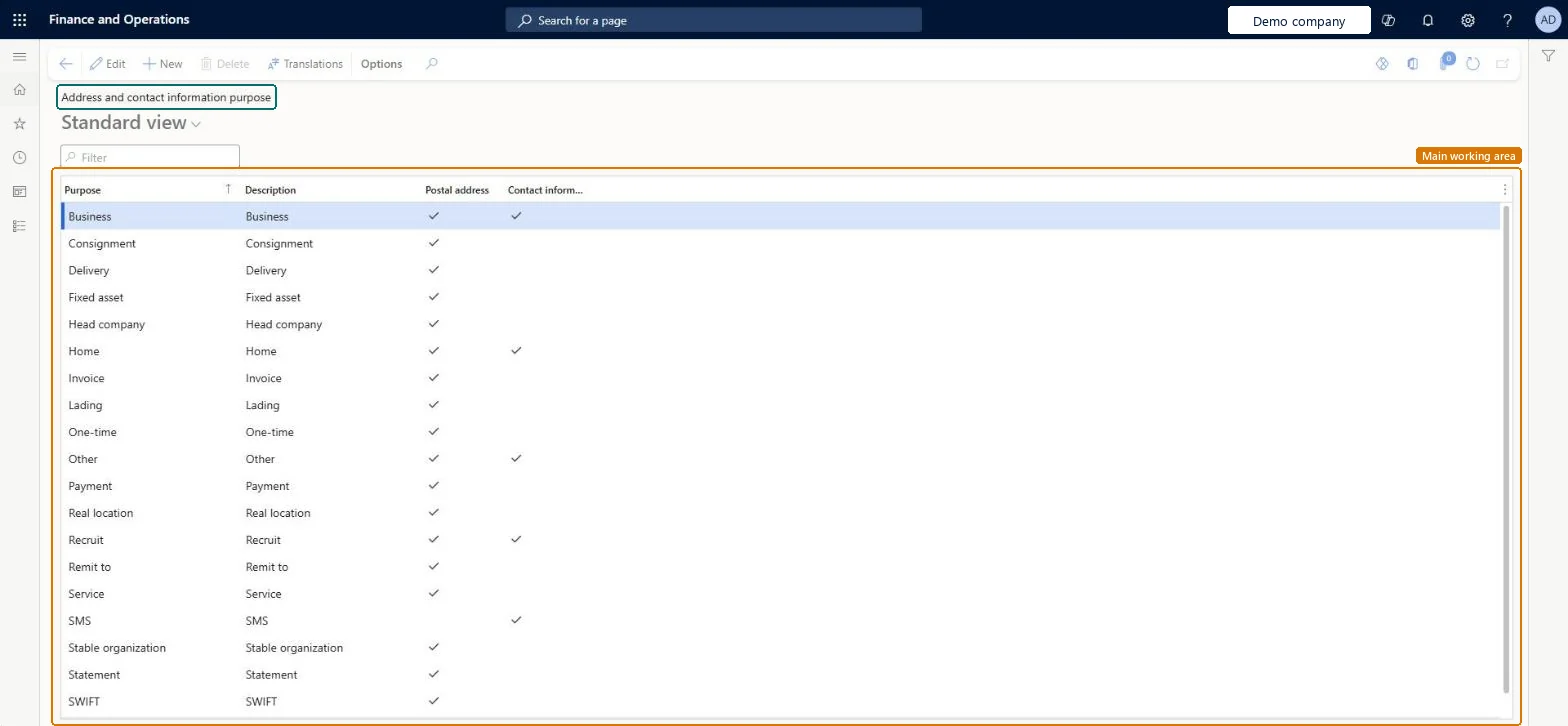
Use this page to add your own purposes, which users can then select when they create an address or contact information.

Business process
Administer system features
Menu item
LogisticsLocationRole
Setup steps
1 on this page
Show what matters for
SETUP GUIDEHow to set it up6 sections. Choose a role to highlight what matters to you.
Everyone

1What it is and why

What it isA setup page for the purposes, such as invoice or delivery, that you give to addresses and contact information.
What you do hereUse this page to add your own purposes, which users can then select when they create an address or contact information.
ExampleFor example, a vendor can have an address with the purpose Invoice and, if you pay by check, another with the purpose Remit-to.
Address and contact information purpose page in Dynamics 365
The page in Dynamics 365. page title tab to open what to set or check
Functional consultant · Solution architect

2Where it fits

Business processAdminister system features
Menu pathOrganization administration › Global address book › Address and contact information purpose
Related pagesTranslations Microsoft Learn
In this process Set up Business document parameters · Set up Activity phases
End user · Functional consultant

3How to do it

About the examples: Examples and screenshots in this guide use BEAT, a demo company in a Dynamics 365 test environment. Use your own company's codes and values instead of copying them.

Step by step, with screenshots

Set up Address and contact information purpose1 screen

Use this page to add your own purposes, which users can then select when they create an address or contact information.

  1. Screen 1

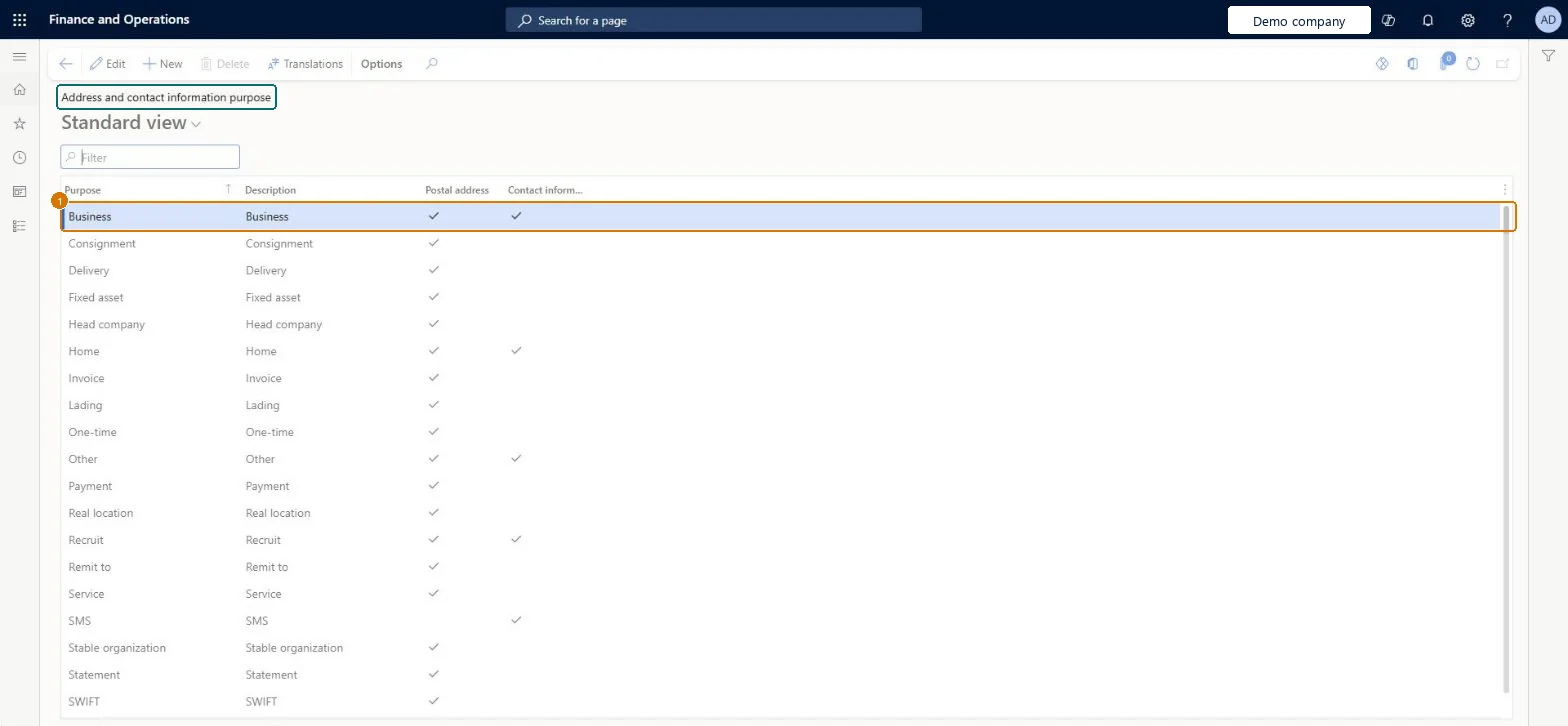
    Check an address and contact information purpose

    Go to Organization administration > Global address book > Address and contact information purpose

    1. Find the purpose in the list
    2. Check whether it applies to postal addresses, contact information or both
    1PurposeBusiness
    1DescriptionBusiness
    Postal addressYes
    Contact informationYes
    Check an address and contact information purpose (zoomed on the outlined fields)
    Show the full screenCheck an address and contact information purpose
    page title tab to open what to set or check

Steps from Microsoft

  1. Go to Organization administration > Global address book > Address and contact information purpose.
  2. Select New.
  3. In the Purpose field, enter a short name.
  4. In the Description field, enter a description.
  5. Select Postal address if the purpose is for postal addresses.
  6. Select Contact information if the purpose is for contact details such as email addresses.
  7. Select Save.

Source: Microsoft Learn

Fields on the page

FieldWhat it meansExampleTable column
PurposeThe short name of the purpose.Microsoft Learn BusinessName
Postal addressMakes the purpose available for postal addresses.Microsoft Learn YesIsPostalAddress
Contact informationMakes the purpose available for contact information, such as email addresses.Microsoft Learn YesIsContactInfo
DescriptionA longer description of the purpose.Checked in Dynamics 365BusinessDescription

Test checklist

  1. Add a purpose on this page with a description and select whether it applies to Postal address, Contact information or both.
  2. Create an address on a customer or vendor and check the new purpose is offered.
  3. Add a contact information line and check the purpose is offered there if selected.

Source: Microsoft Learn

Technical architect

4Technical

Menu itemLogisticsLocationRole Checked in Dynamics 365
FormLogisticsLocationRole Checked in Dynamics 365
Roles to set it up and use itTo set it up or change itInformation technology manager SysServerITManagerAccounting manager LedgerAccountingManagerHuman resource manager HcmHumanResourceManagerTo use itAccounts payable manager VendInvoiceAccountsPayableManagerAccounts receivable manager CustInvoiceAccountsReceivableManagerGive people one of these roles. On this system, 5 roles can open this page.Checked in Dynamics 365
Actions on the pageOptionsChecked in Dynamics 365
Developer

5Developer

Open it by URLhttps://<your-environment>/?mi=LogisticsLocationRole
Everyone

6Sources

To cite this step: OA-GAB-060, Set up Address and contact information purpose. Beyond ERP Atlas Hub, 2026-11-11. https://www.beyonderp.cloud/atlas/step/OA-GAB-060