SETUP GUIDEHow to set it up8 sections. Choose a role to highlight what matters to you.
Everyone
1What it is and why
What it is
A setup page where you activate the inventory transaction combinations that can be used when you set up inventory posting.
What you do here
Use this page to choose which levels of relation can be used on the inventory posting setup.
Example
For example, in Russia you activate the inventory profile combinations so that inventory posting can be set up for inventory profiles or kinds of activity.
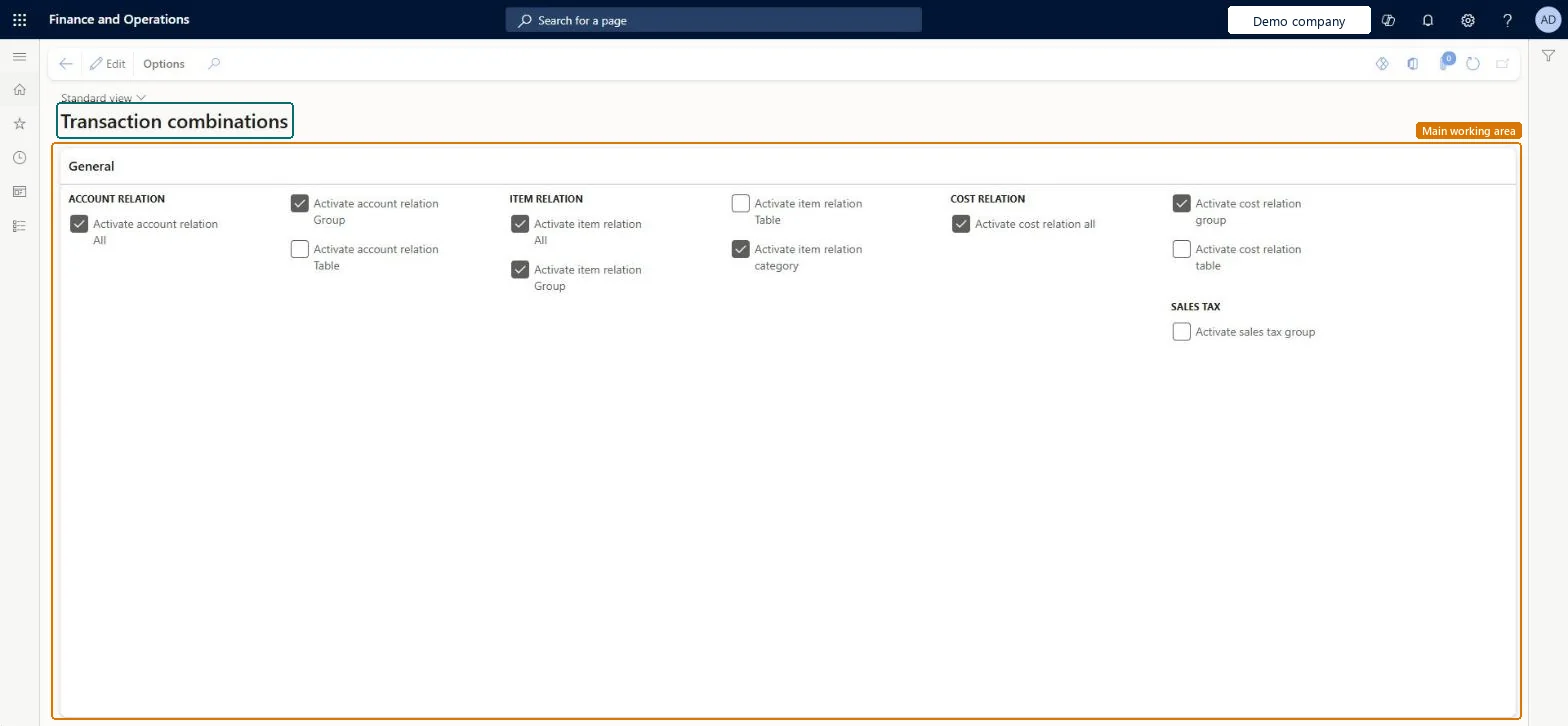
The page in Dynamics 365. page title tab to open what to set or check
About the examples: Examples and screenshots in this guide use BEAT, a demo company in a Dynamics 365 test environment. Use your own company's codes and values instead of copying them.
Step by step, with screenshots
Set up Transaction combinations1 screen
Use this page to choose which levels of relation can be used on the inventory posting setup.
Screen 1
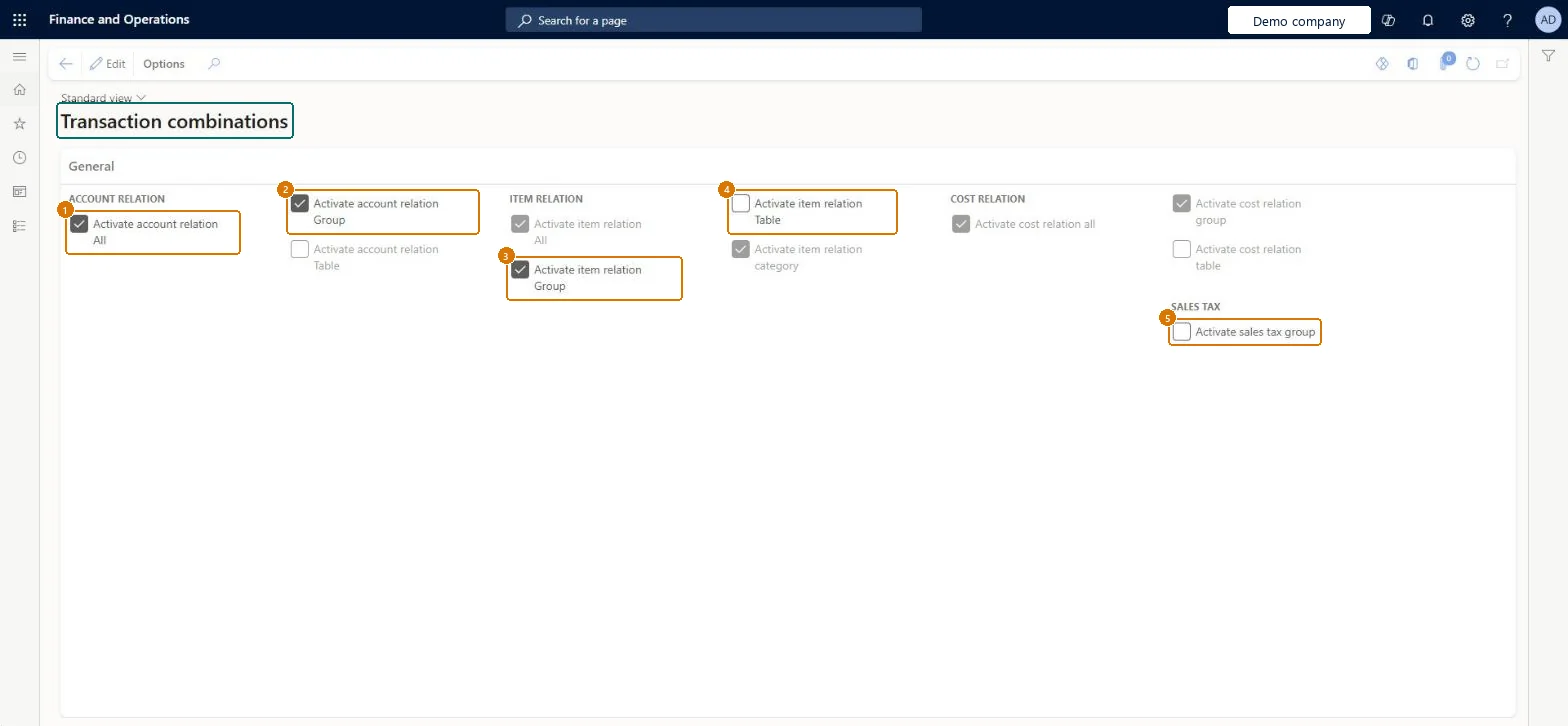
Choose the transaction combinations for inventory posting
Go to Inventory management > Setup > Posting > Transaction combinations
Select Edit
Under Account relation, Item relation and Cost relation, select each level (All, Group, Table, Category) that posting setup lines may use
Under Sales tax, choose whether sales tax groups can be used
Select Save; the selected levels then become available on the Posting page
1Activate account relation All
Yes
2Activate account relation Group
Yes
3Activate item relation Group
Yes
4Activate item relation table
No
5Activate sales tax group
No
Show the full screen page title tab to open what to set or check
Steps from Microsoft
Go to Inventory management > Setup > Posting > Transaction combinations.
Select Edit.
Select the relation checkboxes that you want to activate.
Activate the relation levels (Table, Group, All) you plan to use before you define the inventory posting rulesLearn's standard cost prerequisites say to enable cost relations for tables, groups and all on this page before you define the item posting rules.
Trying to set up posting by item group or by item before the matching relation is activated, so the posting setup can't use that level.
InventPostingParametersShown as “Inventory transaction combinations” in Record infoChecked in Dynamics 365
Data entities
InventLedgerPostingDefinitionCombinationRuleEntityInventory transaction combinations Microsoft data model
Who can open it
PrivilegesMaintain transaction combinations InventPostingParametersMaintainView transaction combinations InventPostingParametersViewDutiesInquire into costing policies CostPoliciesInquireMaintain costing policies CostPoliciesMaintainEnable cost process InventCostCostProcessEnable3 security rolesInventory accountant InventCostAccountantInventory accountant clerk InventCostCostClerkAccounting manager LedgerAccountingManagerChecked in Dynamics 365
Roles to set it up and use it
To set it up or change itAccounting manager LedgerAccountingManagerTo use itInventory accountant clerk InventCostCostClerkInventory accountant InventCostAccountantGive people one of these roles. On this system, 3 roles can open this page.Checked in Dynamics 365
Actions on the page
Options: Personalize, Page options, ShareChecked in Dynamics 365
Checked in a working Dynamics 365 system, version 10.0.49: the menu item, form, table and security, the page, the demo records and the values in the screenshots.
To cite this step: IM-SETUP-380, Set up Transaction combinations. Beyond ERP Atlas Hub, 2026-11-11. https://www.beyonderp.cloud/atlas/step/IM-SETUP-380