Manage supplier settlements in Dynamics 365 Finance
Menu item
VendWriteOffFinancialReasonsSetup
Main table
VendWriteOffFinancialReasonsSetup
Setup steps
1 on this page
Show what matters for
SETUP GUIDEHow to set it up8 sections. Choose a role to highlight what matters to you.
Everyone
1What it is and why
What it is
A setup page where you create the write-off reason codes for vendor transactions, each with an assigned account.
What you do here
Use this page to provide the reason codes, and their accounts, that are used when you settle a remaining vendor amount with Settle remainder.
Example
For example, when a payment does not fully settle a vendor invoice, you can settle the remaining amount to a ledger account with a reason code instead of leaving the invoice open.
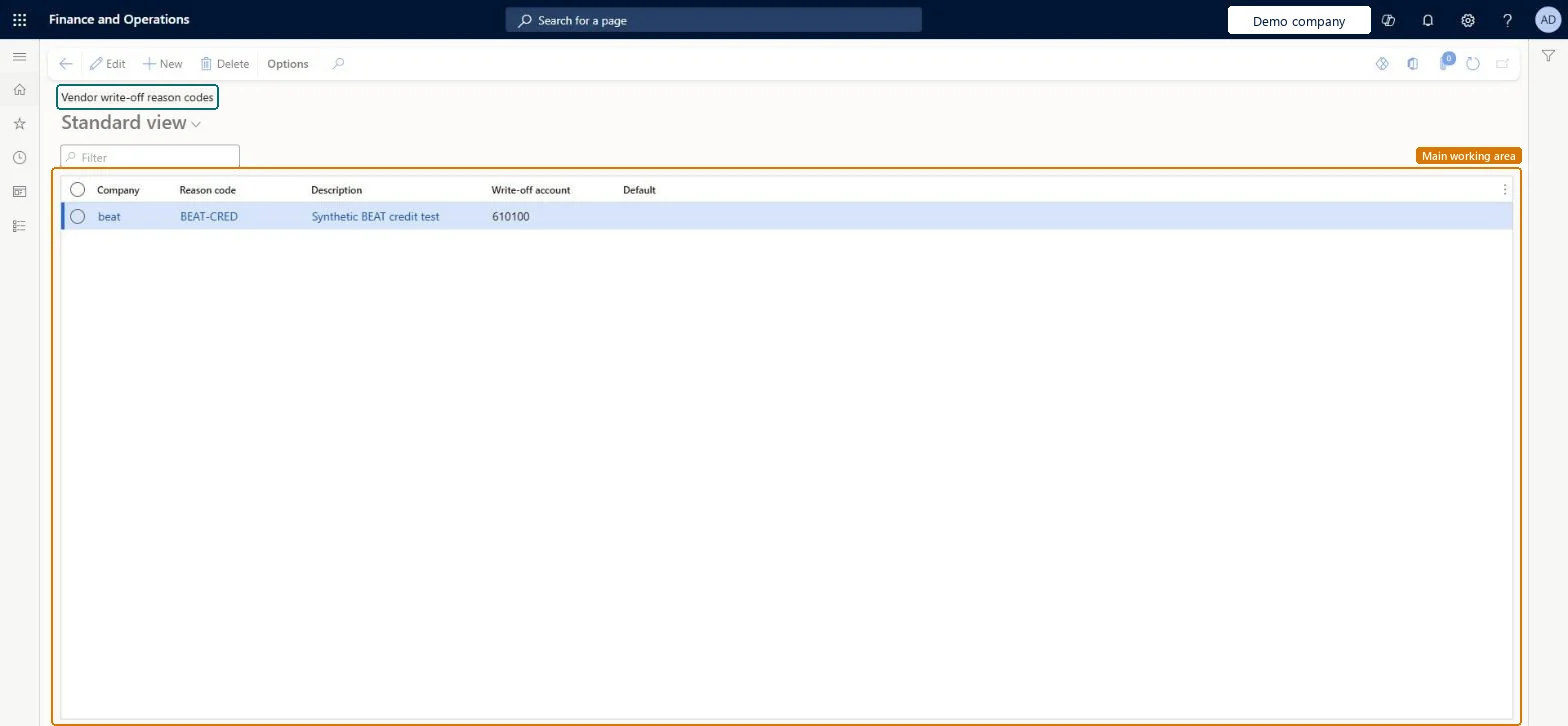
The page in Dynamics 365. page title tab to open what to set or check
About the examples: Examples and screenshots in this guide use BEAT, a demo company in a Dynamics 365 test environment. Use your own company's codes and values instead of copying them.
Step by step, with screenshots
Set up Vendor write-off reason codes1 screen
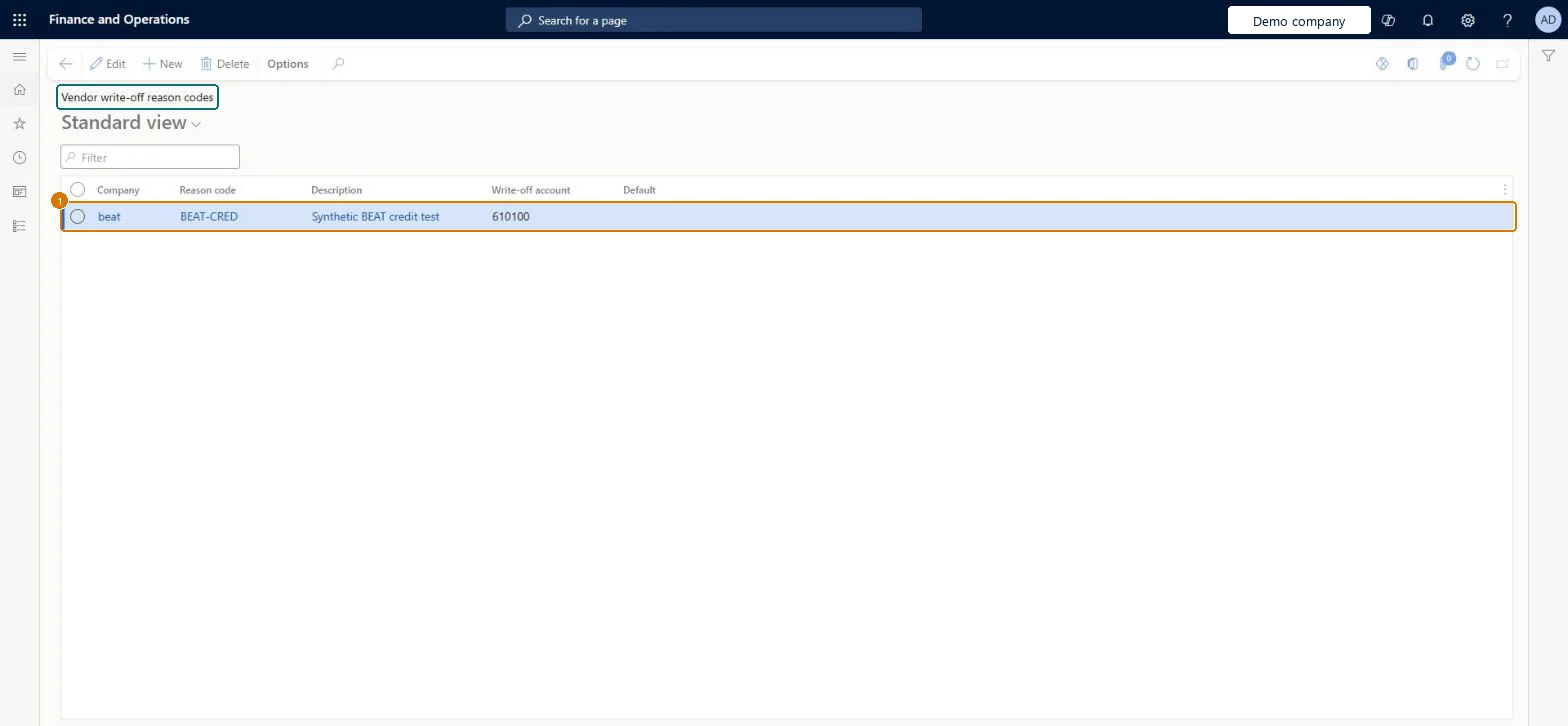
Screen 1
Create the vendor write-off reason code
Go to Accounts payable > Setup > Vendor write-off reason codes
Select New
Enter the reason code, description and write-off account
Leave Default unticked
1Reason code
BEAT-CRED
Description
Credit adjustment
Write-off account
610100
Default
No
Show the full screen page title tab to open what to set or check
How to use it
Go to Accounts payable > Setup > Vendor write-off reason codes.
Select New to add a row.
Enter the Reason code and its Description.
Choose the Write-off account.
Use the Default column to mark a default if it applies.
Select a row and select Edit to change it, or select Delete to remove it.
Source: Checked in Dynamics 365
Fields on the page
Field
What it means
Example
Table column
Reason code
The code that identifies the write-off reason.Checked in Dynamics 365
SMALLBAL
Reason
Description
A short description of the write-off reason.Checked in Dynamics 365
Credit adjustment
Description
Write-off account
610100
WriteOffLedgerDimension
Default
No
IsDefault
Test checklist
Create a write-off reason code with a write-off account.
In Accounts payable parameters, Settlement tab, turn on Enable settle remainder, select the reason as default and a default journal name.
Settle a payment that leaves a small remainder on an invoice and select Settle remainder.
Check the journal line uses the reason's account as offset and the invoice is fully settled after posting.
One reason code per write-off cause with its write-off account, one of them selected as Default reason code on the Settlement tab of Accounts payable parametersSettle remainder needs a default reason code, and the default settle remainder account comes from the account on that reason code.
Turning on Enable settle remainder before the reason codes and a Default journal name exist: the reason codes must already be set up, and a default journal name is required.
Solution architect
5Design impact
Can it be undone
Reversible: The reason and account default into the Settle remainder dialog and can be changed there; edits affect later settlements only.
Technical architect
6Technical
Menu item
VendWriteOffFinancialReasonsSetupChecked in Dynamics 365
Form
VendWriteOffFinancialReasonsSetupChecked in Dynamics 365
Table
VendWriteOffFinancialReasonsSetupShown as “Vendor write-off reason codes” in Record infoKey field: RecIdChecked in Dynamics 365
Who can open it
PrivilegesProcess settle remainder for vendors VendSettlementWriteOffProcessDutiesMaintain vendor payments PaymVendorPaymentsMaintain1 security roleAccounts payable payments clerk PaymAccountsPayablePaymentsClerkChecked in Dynamics 365
Roles to set it up and use it
To set it up or change itAccounts payable payments clerk PaymAccountsPayablePaymentsClerkGive people one of these roles. On this system, 1 role can open this page.Checked in Dynamics 365
Actions on the page
Options: Personalize, Page options, ShareChecked in Dynamics 365
Checked in a working Dynamics 365 system, version 10.0.49: the menu item, form, table and security, the page, the demo records and the values in the screenshots.
To cite this step: AP-SETUP-190, Set up Vendor write-off reason codes. Beyond ERP Atlas Hub, 2026-11-11. https://www.beyonderp.cloud/atlas/step/AP-SETUP-190