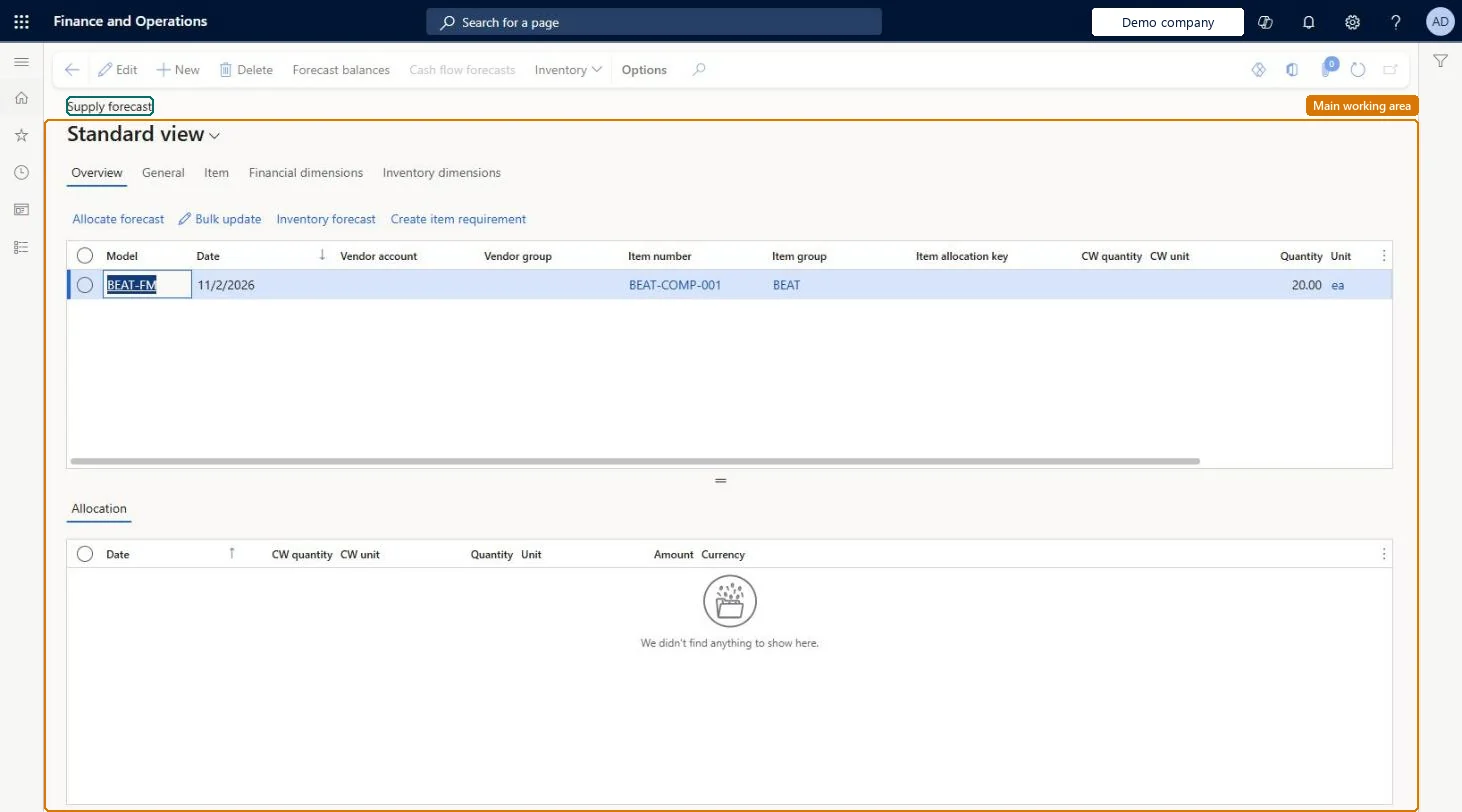
About the examples: Examples and screenshots in this guide use BEAT, a demo company in a Dynamics 365 test environment. Use your own company's codes and values instead of copying them.
Steps from Microsoft
Go to Master planning > Forecasting > Supply forecast lines.
On the Action Pane, select New.
In the Model field, select the forecast model, and then enter the item or vendor details and the quantity.
On the Overview tab, select Allocate forecast on the toolbar.
Review the time horizon and intervals in the Allocation grid.
PrivilegesMaintain supply forecasts for item groups ForecastPurchMaintainView supply forecasts for item groups ForecastPurchViewDutiesCash flow position details drill down CashflowPositionDetailsDrillDownMaintain supply forecasts ForecastSupplyForecastMaintainInquire into supply forecasts ForecastSupplyForecastProgressInquire4 security rolesMaterials manager InventMaterialsManagerTreasurer PaymTreasurerProduction planner ReqProductionPlannerPurchasing manager TradePurchasingManagerChecked in Dynamics 365
Roles to set it up and use it
To set it up or change itProduction planner ReqProductionPlannerPurchasing manager TradePurchasingManagerTo use itMaterials manager InventMaterialsManagerTreasurer PaymTreasurerGive people one of these roles. On this system, 4 roles can open this page.Checked in Dynamics 365
Actions on the page
(Action Pane without tabs): Forecast balances, Cash flow forecasts, InventoryChecked in Dynamics 365