Receiving clerk, Landed cost agent, Landed cost manager and 2 more roles
Business process
Maintain inventory levels
Menu item
WMSArrivalOverviewProfile
Main table
WMSArrivalOverviewProfile
Setup steps
1 on this page
Show what matters for
PAGE GUIDEWhat the page does and how to use it8 sections. Choose a role to highlight what matters to you.
Everyone
1What it is and why
What it is
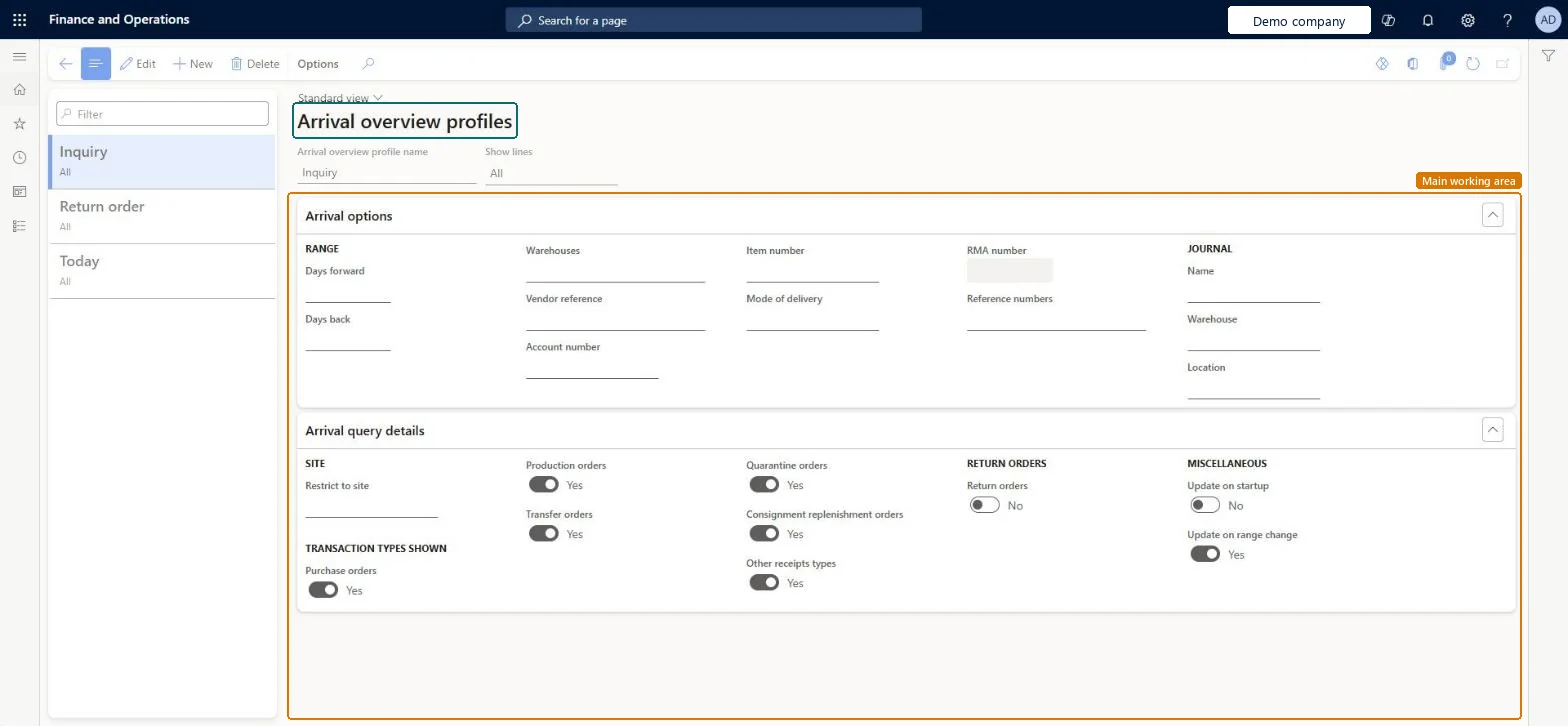
A setup page where you save sets of rules and filters that are applied when the Arrival overview page is opened.
What you do here
It is used by each user to keep personal settings for receiving, such as which warehouses and dates to show and which journal, warehouse and location to use.
Example
For example, a worker at a location that receives finished goods from production at Site 1 creates a profile named Site 1 production.
The page in Dynamics 365. page title tab to open what to set or check
About the examples: Examples and screenshots in this guide use BEAT, a demo company in a Dynamics 365 test environment. Use your own company's codes and values instead of copying them.
Step by step, with screenshots
Set up Arrival overview profiles1 screen
It is used by each user to keep personal settings for receiving, such as which warehouses and dates to show and which journal, warehouse and location to use.
Screen 1
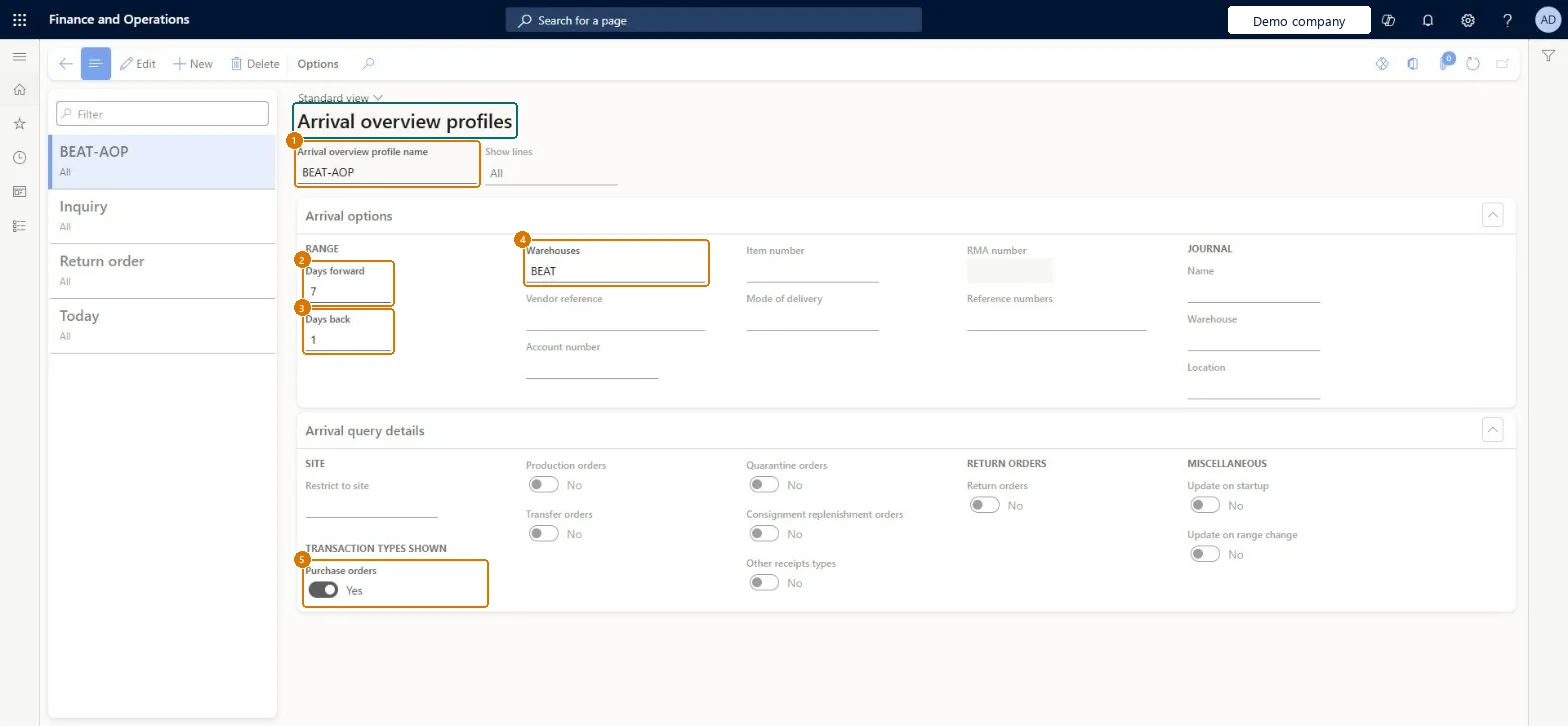
Create an arrival overview profile
Go to Inventory management > Setup > Distribution > Arrival overview profiles
Make sure the warehouse exists (here demo warehouse BEAT)
Select New
Enter the profile name
Under Range, enter the days back and days forward to show
Enter the warehouses to show
Under Transaction types shown, turn on the order types to include
Select Save
1Arrival overview profile name
BEAT-AOP
2Days forward
7
3Days back
1
4Warehouses
BEAT
5Purchase orders
Yes
Show the full screen page title tab to open what to set or check
Steps from Microsoft
Go to Inventory management > Setup > Distribution > Arrival overview profiles.
Select New.
In the Arrival overview profile name field, enter a name.
In the Show lines field, select All, In progress or Not complete.
In the Days forward and Days back fields, set the date range of receipt lines to show.
In the Warehouses and Mode of delivery fields, set filters.
Select the journal Name, and the default Warehouse and Location for registered receipt lines.
In the Restrict to site field, select a site.
Set the Purchase orders and Transfer orders options to choose which receipt lines to show.
Create a profile with Show lines = Not complete, Days forward/back, a warehouse filter, journal name, Warehouse and Location, and Purchase orders = Yes.
Open Arrival overview with the profile and check only matching purchase receipt lines in the date window are shown.
Start arrival for a line and check the arrival journal line uses the profile's warehouse and location.
One profile per receiving clerk's usual warehouse, with the arrival journal name and the default receiving Warehouse and Location (for example the bay door) filled inLearn suggests a profile when a clerk almost always receives in the same warehouse, so registration of received items is quicker; Warehouse and Location become the defaults on registered receipt lines.
Reversible: Profiles are filters and defaults applied when Arrival overview opens; editing them doesn't change receipts already registered. Microsoft Learn
If you change it later
Warehouse and Location values on the profile are used on the arrival journal lines; if they're left blank, the values from the inventory transactions are used. Microsoft Learn
Technical architect
6Technical
Menu item
WMSArrivalOverviewProfileChecked in Dynamics 365
Form
WMSArrivalOverviewProfileChecked in Dynamics 365
Table
WMSArrivalOverviewProfileShown as “Arrival overview profiles” in Record infoChecked in Dynamics 365
To set it up or change itWarehouse manager WMSWarehouseManagerReceiving clerk InventReceivingClerkProcess engineer RouteProcessEngineerLanded cost agent ITMAgentTo use itLanded cost manager ITMManagerGive people one of these roles. On this system, 5 roles can open this page.Checked in Dynamics 365
Actions on the page
Options: Personalize, Page options, ShareChecked in Dynamics 365
Checked in a working Dynamics 365 system, version 10.0.49: the menu item, form, table and security, the page, the demo records and the values in the screenshots.