About the examples: Examples and screenshots in this guide use BEAT, a demo company in a Dynamics 365 test environment. Use your own company's codes and values instead of copying them.
Setup steps on this page
Set up Styles
Use this page to maintain the list of styles that product masters can combine with other product dimensions to define product variants.
How to use it
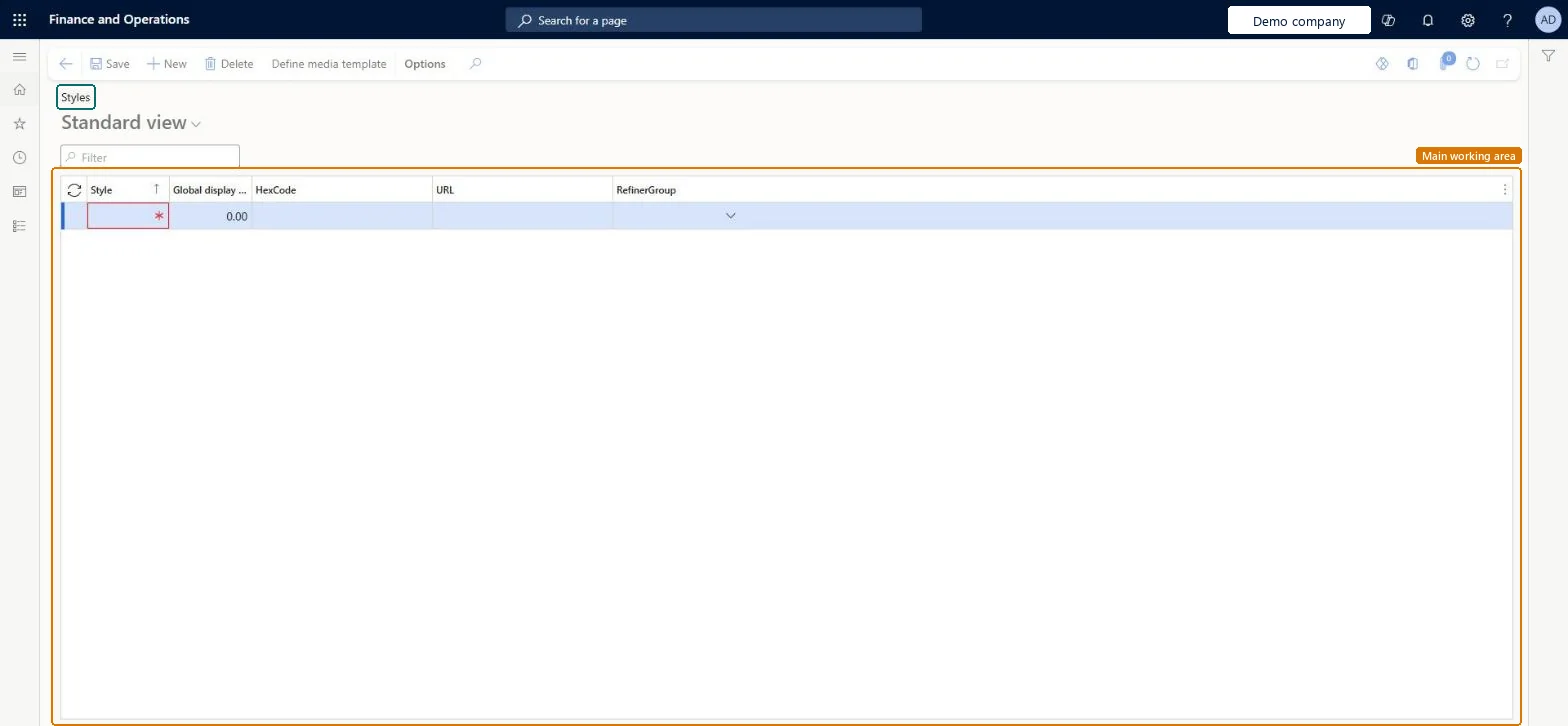
Go to Product information management > Setup > Dimension and variant groups > Styles.
On the Action Pane, select New to add a row.
In the Style field, enter the style value.
Fill in the other columns shown as needed, such as HexCode, URL and RefinerGroup.
Select Save.
Source: Checked in Dynamics 365
Test checklist
Create styles Polo and V.
Open a product master with a Style dimension and add them on Product dimensions.
One shared list of style values, bundled into style groups that you assign to product mastersStyle values are created once on this page and shared; style groups let a product master use all the styles in the group.
Expecting a new style to appear on existing products. It must be added to the product master's product dimensions and variants must be created and released for it.
PrivilegesMaintain retail EcoResStyle RetailEcoResStyleMaintainView styles RetailEcoResStyleViewDutiesMaintain products definition master EcoResProductDefinitionMasterMaintainInquire into products for operations master EcoResProductForOperationsMasterInquireMaintain products for operations master InventProductsForOperationsMasterMaintaMaintain retail product reference data RetailItemReferenceDataMaintain14 security rolesProduct designer BOMProductDesignerProduct design manager BOMProductDesignManagerMaterials manager InventMaterialsManagerQuality control manager InventQualityControlManagerLanded cost agent ITMAgentLanded cost manager ITMManagerShop supervisor JmgShopSupervisorProduction supervisor ProdProductionSupervisorRetail catalog manager RetailCatalogManagerRetail merchandising manager RetailMerchandisingManagerRetail service RetailServiceProcess engineer RouteProcessEngineerProcess engineering manager RouteProcessEngineeringManagerWarehouse manager WMSWarehouseManagerChecked in Dynamics 365
Roles to set it up and use it
To set it up or change itProduct designer BOMProductDesignerProcess engineer RouteProcessEngineerRetail service RetailServiceRetail merchandising manager RetailMerchandisingManagerRetail catalog manager RetailCatalogManagerTo use itProduct design manager BOMProductDesignManagerProcess engineering manager RouteProcessEngineeringManagerMaterials manager InventMaterialsManagerProduction supervisor ProdProductionSupervisorWarehouse manager WMSWarehouseManagerGive people one of these roles. On this system, 14 roles can open this page.Checked in Dynamics 365
Actions on the page
(Action Pane without tabs): Define media templateChecked in Dynamics 365