About the examples: Examples and screenshots in this guide use BEAT, a demo company in a Dynamics 365 test environment. Use your own company's codes and values instead of copying them.
Steps from Microsoft
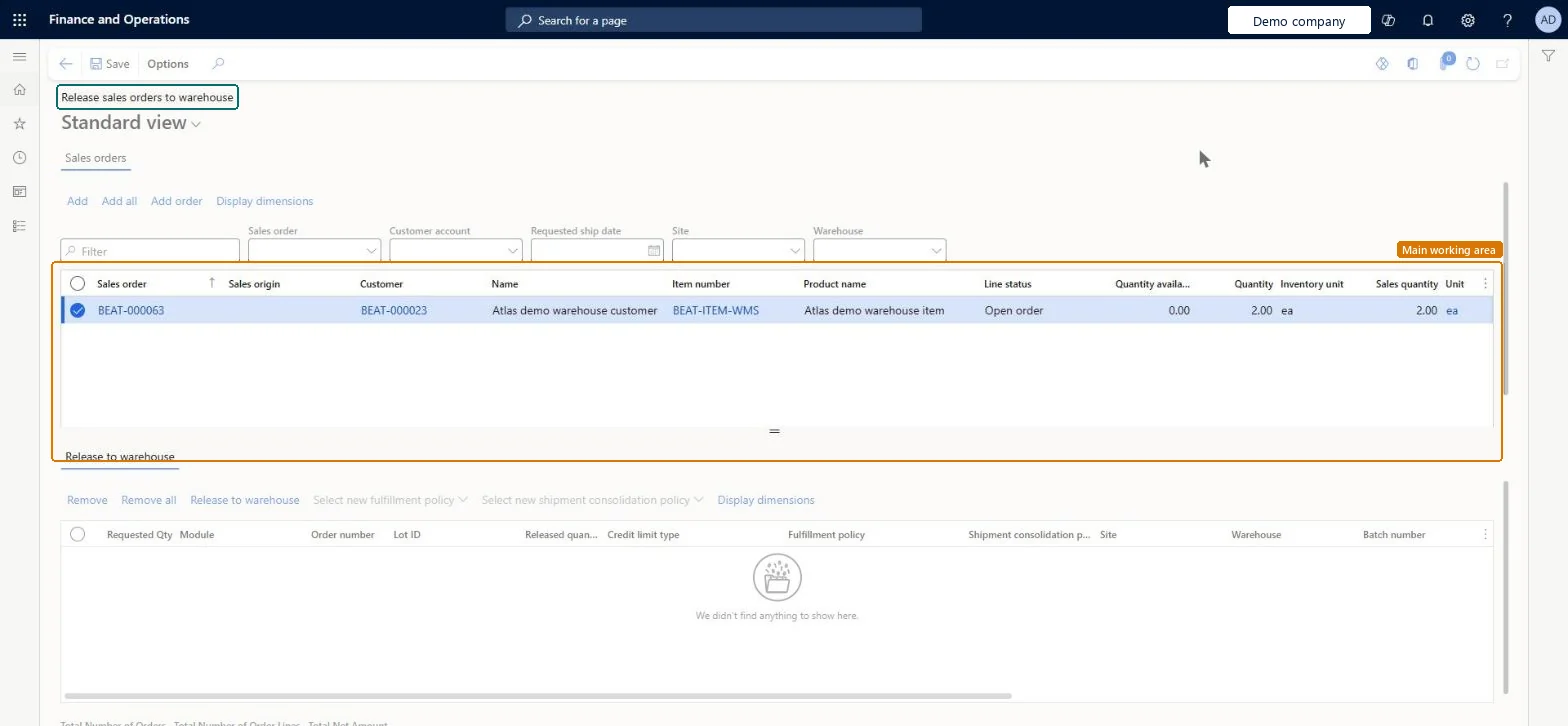
Go to Warehouse management > Release to warehouse > Release sales orders to warehouse.
Use the filters in the upper section, such as Sales order, Customer account, Requested ship date, Site and Warehouse, to find the lines you want to release.
Select Add, Add all or Add order to move lines to the lower section.
Adds the order lines you have selected in the upper section to the lower section.Microsoft Learn
Add all
Adds every line from the upper section to the lower section.Microsoft Learn
Add order
Adds all lines of the selected order to the lower section.Microsoft Learn
Shipment consolidation policy
In the lower grid, shows the shipment consolidation policy that has been applied to the line.Microsoft Learn
ShipConsolidationPolicy
Select new shipment consolidation policy
Lets you choose a different consolidation policy for the selected lines.Microsoft Learn
Technical architect
4Technical
Menu item
WHSReleaseToWarehouseSalesOrderChecked in Dynamics 365
Form
WHSReleaseToWarehouseSalesOrderChecked in Dynamics 365
Table
WHSTmpReleaseToWarehouseShown as “RELEASE TO WAREHOUSE” in Record infoChecked in Dynamics 365
Roles to set it up and use it
To set it up or change itTransportation coordinator TMSTransportationCoordinatorSales clerk TradeSalesClerkRetail service RetailServiceTo use itWarehouse planner WHSWarehousePlannerWarehouse manager WMSWarehouseManagerWarehouse worker WMSWarehouseWorkerShipping clerk InventShippingClerkReceiving clerk InventReceivingClerkGive people one of these roles. On this system, 8 roles can open this page.Checked in Dynamics 365