PAGE GUIDEWhat the page does and how to use it8 sections. Choose a role to highlight what matters to you.
Everyone
1What it is and why
What it is
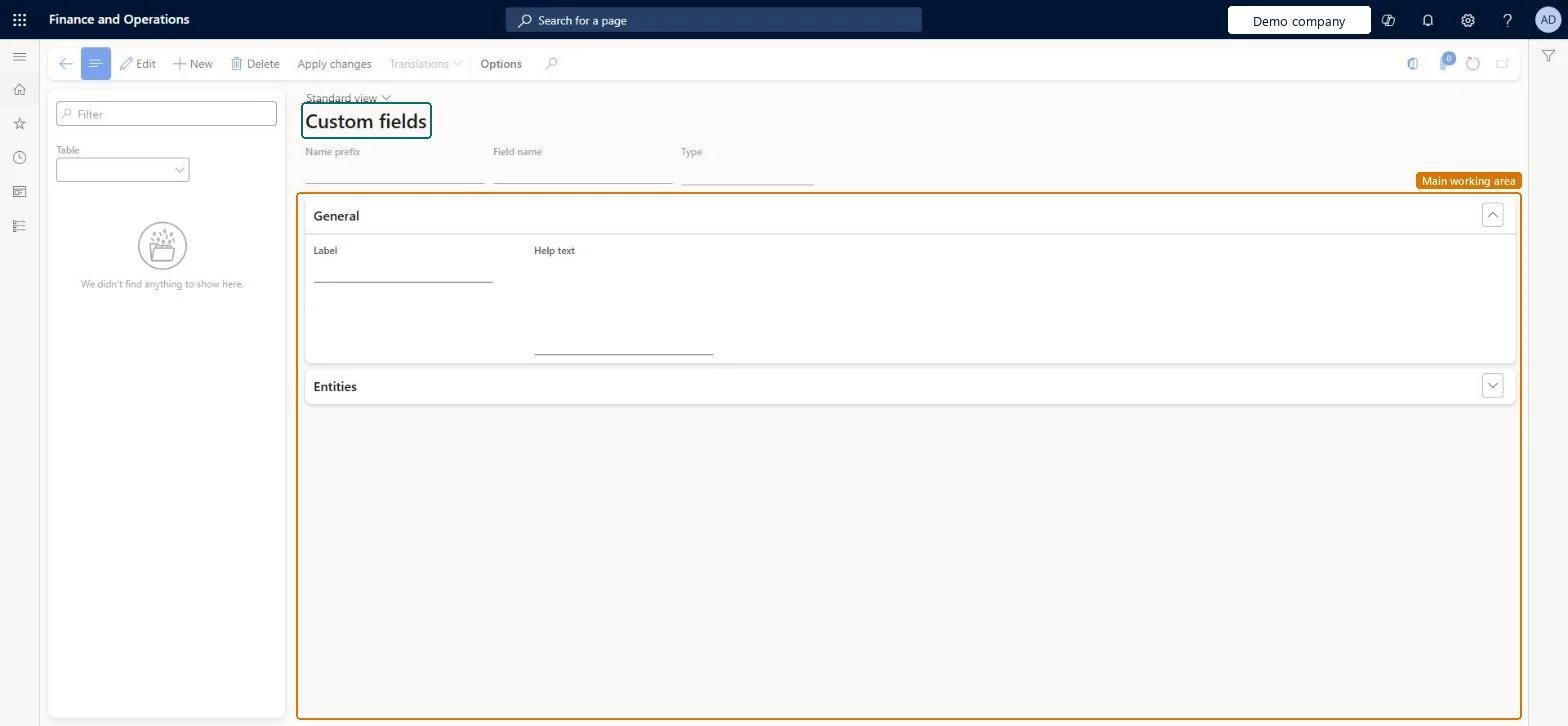
A setup page that lists every custom field in the system, table by table, and lets you manage them.
What you do here
Use this page to view, edit, delete and translate custom fields that were added from the user interface, and to show them on data entities.
Example
For example, BEAT adds a Picklist custom field Delivery zone with the values North, South and East to the customer page, then enables it on the customer data entity here so the zone is included when customers are exported or edited in Excel.
The page in Dynamics 365. page title tab to open what to set or check
About the examples: Examples and screenshots in this guide use BEAT, a demo company in a Dynamics 365 test environment. Use your own company's codes and values instead of copying them.
Step by step, with screenshots
Set up Custom fields1 screen
Use this page to view, edit, delete and translate custom fields that were added from the user interface, and to show them on data entities.
Screen 1
Review the custom fields
Go to System administration > Setup > Custom fields
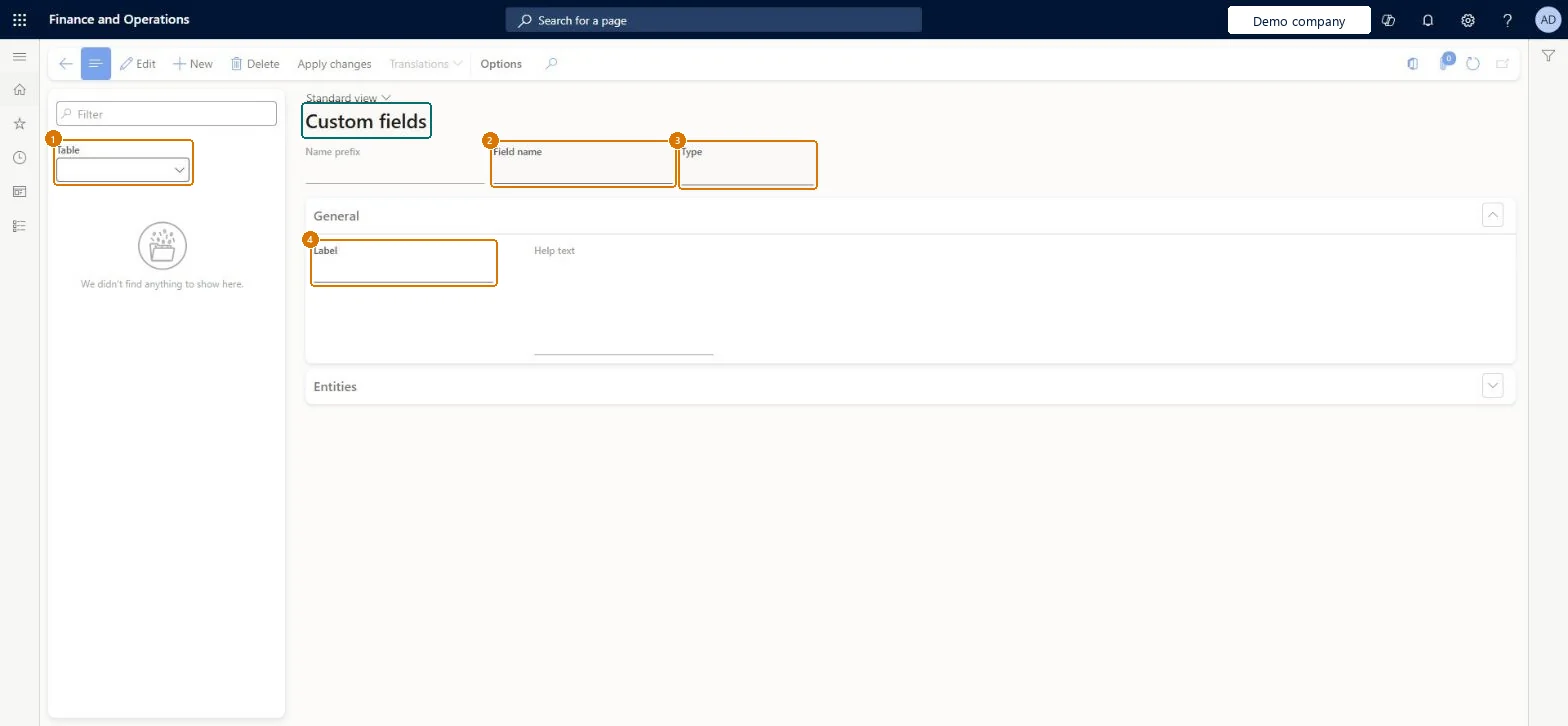
Select a table to list the custom fields added to it
Select a field to review its name, type, label and help text
Open the Entities section to see which data entities show the field
Select Apply changes after editing or deleting a custom field
Show the full screen page title tab to open what to set or check
Steps from Microsoft
Go to System administration > Setup > Custom fields and select the custom field.
Expand the Entities section to see the related data entities.
Select Edit.
Select Enabled for each entity that should show the field.
Agree each field's name, data type and picklist values before creating it, and enable it only on the entities that need itAfter creation only the label, help text and text length can be edited; the field name and data type can't change and picklist values can't be removed. There's a limit of 20 custom fields per table.
On this system the page opens for Information technology manager. Only users with special permissions can create custom fields. No Feature management feature needs to be turned on for this page.
One-way: Warning: A deleted custom field and its data can't be restored, and the field name, data type and existing picklist values can't be changed after creation. Microsoft Learn
If you change it later
Deleting a custom field can't be undone and permanently deletes its data; the field name and data type can't be changed after creation. Microsoft Learn
Technical architect
6Technical
Menu item
SysCustomFieldManageFieldsChecked in Dynamics 365
Form
SysCustomFieldManageFieldsChecked in Dynamics 365
Table
SysCustomFieldDefinitionTmpShown as “Custom fields” in Record infoChecked in Dynamics 365
Who can open it
PrivilegesManage all custom field definitions SysCustomFieldManageFieldsMaintainDutiesManage all custom field definitions SysCustomFieldManageFieldsMaintain1 security roleInformation technology manager SysServerITManagerChecked in Dynamics 365
Roles to set it up and use it
To set it up or change itInformation technology manager SysServerITManagerGive people one of these roles. On this system, 1 role can open this page.Checked in Dynamics 365
Actions on the page
Options: Page options, ShareChecked in Dynamics 365
Load order: Custom fields has no data entity in Data management, so it can't be loaded from a file or a configuration template. Microsoft recommends re-creating each custom field by hand in the target environment from this page's list for the table, selecting Apply changes, and then exporting the personalizations that show the fields and importing them in the target environment.Microsoft Learn
Checked in a working Dynamics 365 system, version 10.0.49: the menu item, form, table and security, the page, the demo records and the values in the screenshots.