About the examples: Examples and screenshots in this guide use BEAT, a demo company in a Dynamics 365 test environment. Use your own company's codes and values instead of copying them.
Step by step, with screenshots
Set up Calibration label layout1 screen
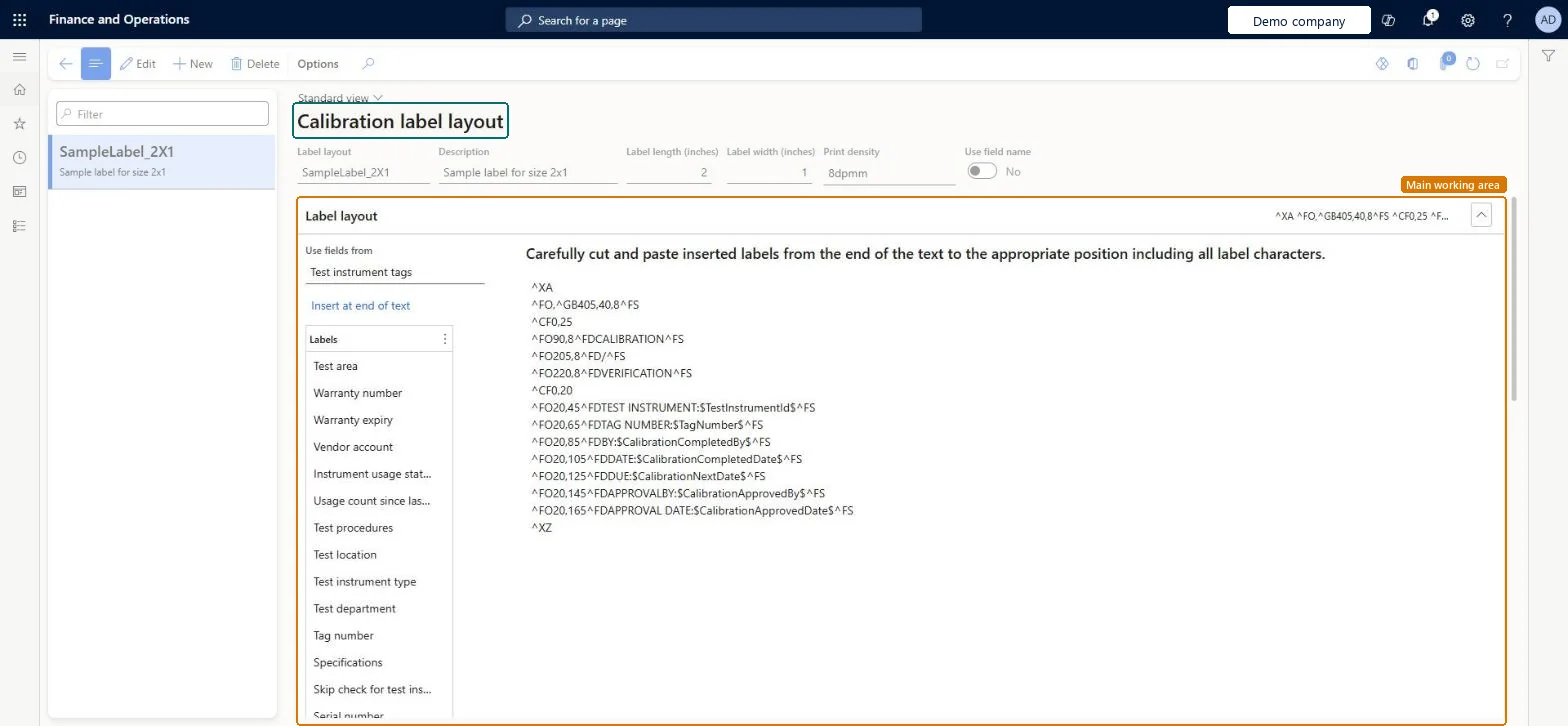
Use this page to choose what a calibration label shows, such as the tag number, instrument type, calibration procedure and next calibration date.
Screen 1
Create a calibration label layout
Go to Inventory management > Setup > Quality control > Calibration label layout
Select New
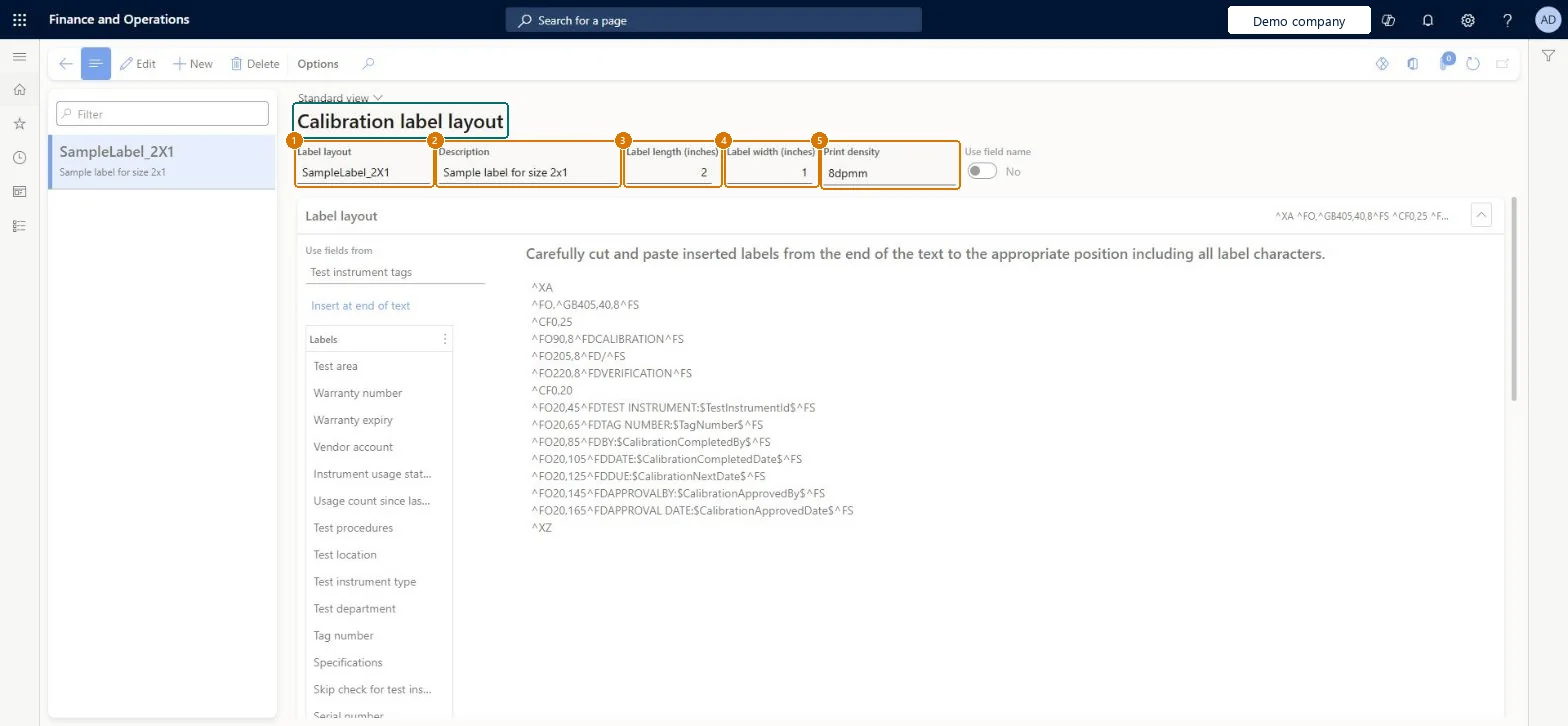
Enter the label layout name and a description
Enter the label length and width in inches and the print density
Under Label layout, choose the fields to use from test instrument tags and select Insert at end of text
Arrange the label text, then select Save
1Label layout
SampleLabel_2X1
2Description
Sample label for size 2x1
3Label length (inches)
2
4Label width (inches)
1
5Print density
8dpmm
Show the full screen page title tab to open what to set or check
Steps from Microsoft
Go to Inventory management > Setup > Quality control > Calibration label layout.
Create a new layout, or select one to edit.
In the header, enter the name, description and dimensions.
On the Label layout FastTab, write the label in ZPL.
To add a field value, set Use fields from, select a field in the Labels list, and select Insert at end of text.
Move the inserted code to the right place in the layout.
Start from SampleLabel_2X1 and change it; insert field codes with Use fields from instead of typing themLearn provides a predesigned ZPL layout for Zebra printers and a field picker that inserts the reference codes for tag and calibration record fields.
A layout that isn't assigned to the test instrument type isn't used, because printing takes the layout from the tag's test instrument type.
Feature management and licence
Feature to turn on
Advanced quality management (Mandatory, on by default)
Reversible: Layouts can be edited or deleted at any time. The change applies the next time a label is printed. Microsoft Learn
Technical architect
6Technical
Menu item
QMSInventCalibrationLabelLayoutChecked in Dynamics 365
Form
QMSInventCalibrationLabelLayoutChecked in Dynamics 365
Table
QMSInventCalibrationLabelLayoutShown as “Calibration label layout” in Record infoChecked in Dynamics 365
Data entities
QMSTestInstrumentCalibrationLabelLayoutEntityTest instrument calibration label layouts Checked in Dynamics 365QMSSampleLabelLayoutEntityQuality sample label layouts Checked in Dynamics 365
Who can open it
PrivilegesMaintain calibration label layouts QMSCalibrationLabelLayoutMaintainView calibration label layouts QMSCalibrationLabelLayoutViewDutiesInquire into general calibration details QMSInventCalibrationDetailInquireMaintain general calibration details QMSInventCalibrationDetailMaintain2 security rolesQuality control clerk InventQualityControlClerkQuality control manager InventQualityControlManagerChecked in Dynamics 365
Roles to set it up and use it
To set it up or change itQuality control manager InventQualityControlManagerQuality control clerk InventQualityControlClerkGive people one of these roles. On this system, 2 roles can open this page.Checked in Dynamics 365
Actions on the page
Options: Personalize, Page options, ShareChecked in Dynamics 365
Checked in a working Dynamics 365 system, version 10.0.49: the menu item, form, table and security, the page, the demo records and the values in the screenshots.