About the examples: Examples and screenshots in this guide use BEAT, a demo company in a Dynamics 365 test environment. Use your own company's codes and values instead of copying them.
Setup steps on this page
Set up Price point groups
How to use it
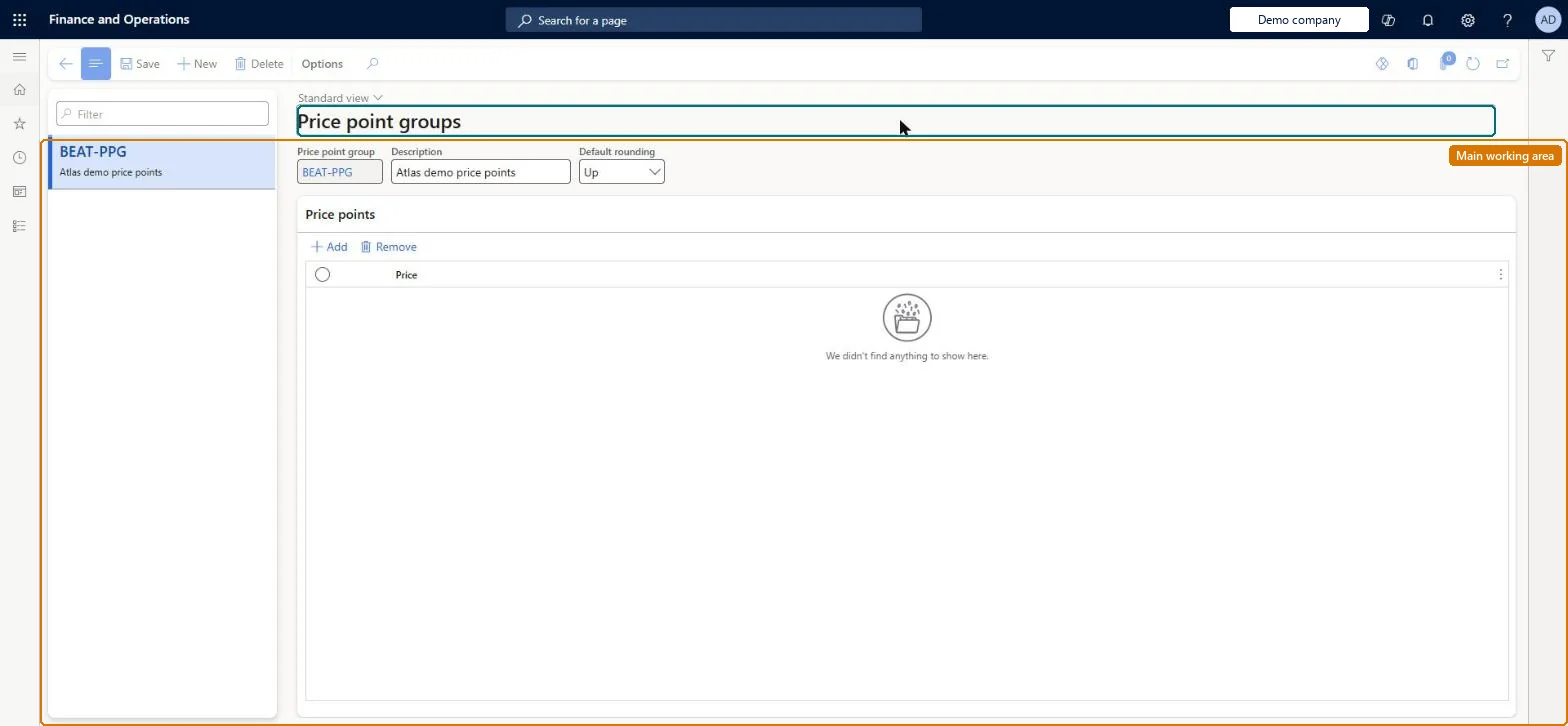
Go to Retail and Commerce > Products and categories > Vendor catalog import > Price point groups.
Use the Filter box to find a group.
Select New and enter the Price point group and Description, and choose the Default rounding.
Under Price points, select Add and enter each Price the imported vendor prices are rounded to.
Select Save; select Remove to take a price point out of the group.
Source: Checked in Dynamics 365
Technical architect
4Technical
Menu item
RetailSalesPricePointGroupChecked in Dynamics 365
Form
RetailSalesPricePointGroupChecked in Dynamics 365
Table
RetailSalesPricePointGroupShown as “PRICE POINT GROUP” in Record infoChecked in Dynamics 365
PrivilegesMaintain retail pricing RetailPricingMaintainDutiesMaintain retail product pricing RetailProductPricingMaintain2 security rolesRetail merchandising manager RetailMerchandisingManagerRetail service RetailServiceChecked in Dynamics 365
Roles to set it up and use it
To set it up or change itRetail service RetailServiceRetail merchandising manager RetailMerchandisingManagerGive people one of these roles. On this system, 2 roles can open this page.Checked in Dynamics 365