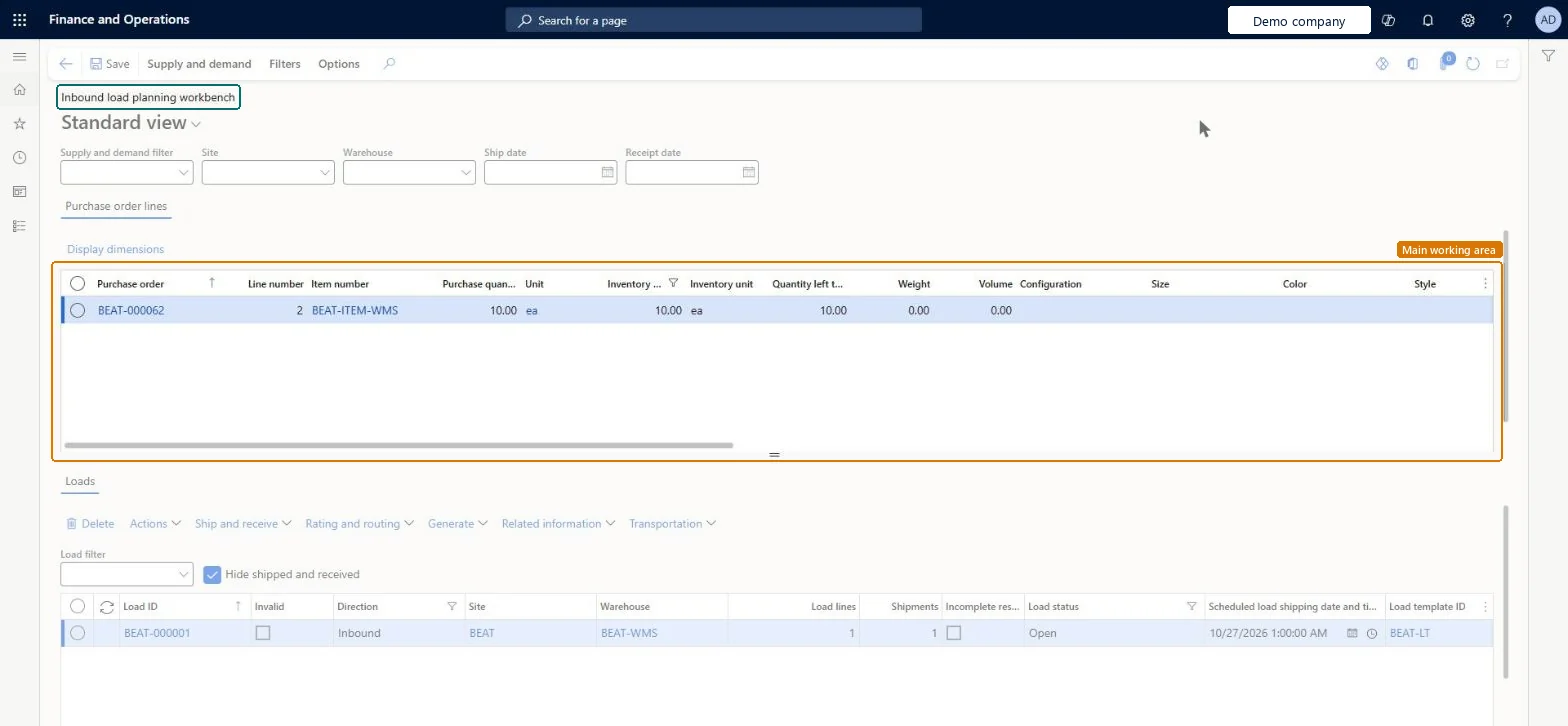
About the examples: Examples and screenshots in this guide use BEAT, a demo company in a Dynamics 365 test environment. Use your own company's codes and values instead of copying them.
Steps from Microsoft
Go to Warehouse management > Loads > Inbound load planning workbench.
Use the filter options at the top of the page to find the order lines that you want to assign to a load.
Select the Purchase order lines tab, or the Inbound shipment order lines tab when it is shown, depending on the type of order lines.
Mark each order line that you want to assign to a load.
On the Action Pane, on the Supply and demand tab, select To new load.
In the Load template assignment dialog box, set the Load template ID field to the load template that you want to use.
Hard to reverse: While the load is open you can add lines or change quantities. Once a product receipt is posted from the load and Load status becomes Received, no more product receipts can be posted from that load; later quantities must be posted from the purchase order. Microsoft Learn
Technical architect
5Technical
Menu item
WHSInboundLoadPlanningWorkbenchChecked in Dynamics 365
Form
WHSInboundLoadPlanningWorkbenchChecked in Dynamics 365
Table
PurchLineShown as “PURCHASE ORDER LINES” in Record infoKey field: InventTransIdChecked in Dynamics 365
To set it up or change itTransportation coordinator TMSTransportationCoordinatorTo use itWarehouse planner WHSWarehousePlannerWarehouse manager WMSWarehouseManagerLogistics manager TMSLogisticsManagerGive people one of these roles. On this system, 4 roles can open this page.Checked in Dynamics 365
Actions on the page
Supply and demand: Add, Related information, ConsolidateFilters: ManageChecked in Dynamics 365