Product information management › Setup › Warranty › Warranty groups
End user · Functional consultant
3How to do it
About the examples: Examples and screenshots in this guide use BEAT, a demo company in a Dynamics 365 test environment. Use your own company's codes and values instead of copying them.
Setup steps on this page
Set up Warranty groups
Use this page to set up which warranty items the point of sale (POS) offers when a warrantable item is added to a customer's cart.
Steps from Microsoft
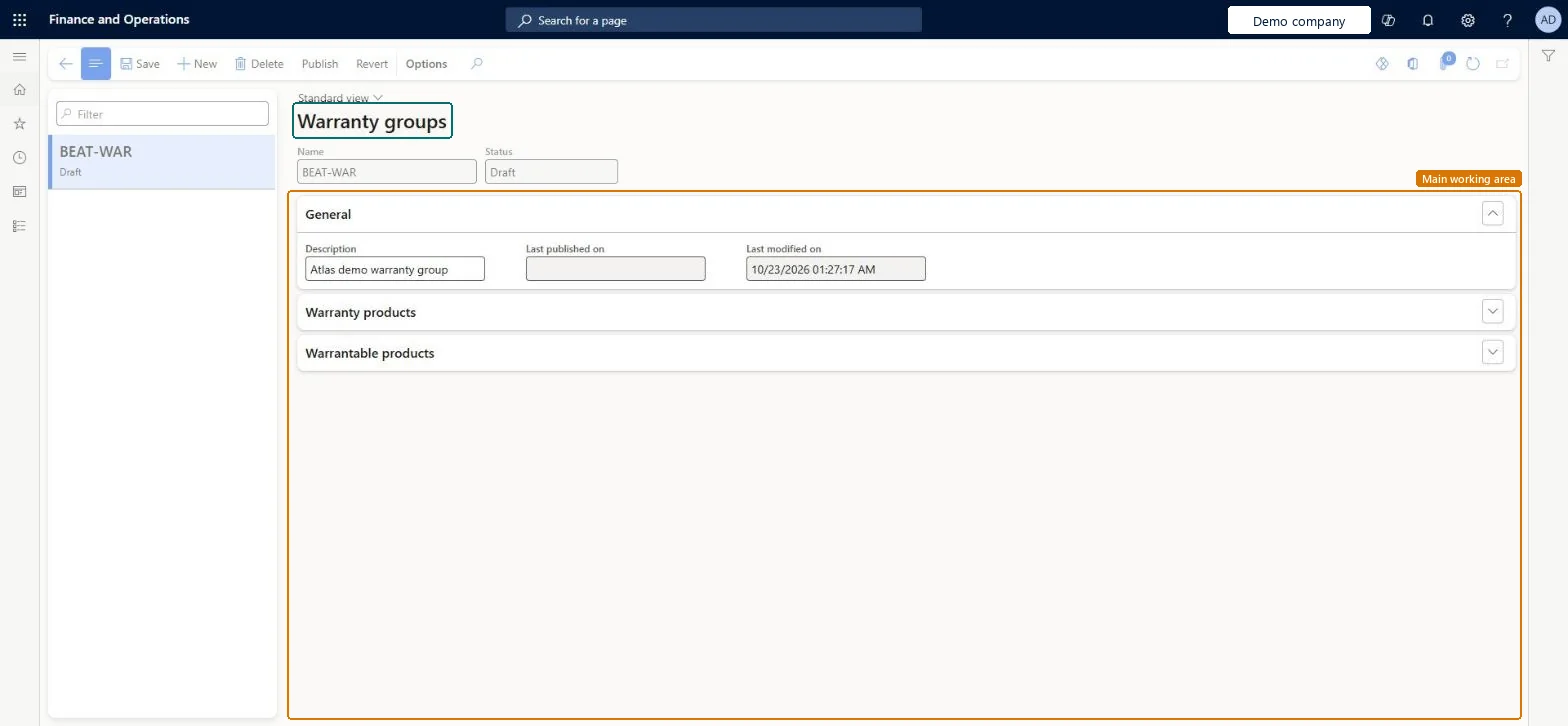
Go to Product information management > Setup > Warranty > Warranty groups.
Select New to create a warranty group, and in the Name field, enter a name for the new group.
On the General FastTab, in the Description field, enter a description of the group.
On the Warranty products FastTab, select Add line to add a warranty item, and in the Display order field, enter a number to rank it.
On the Warrantable products FastTab, select Add line, and then select either a category in the Category field or a specific product in the Product field.
Link warranty items to warrantable categories (or single products), add the channels, Publish, then run job 1040The POS uses the published group to decide which warranties to offer, ordered by Display order, and job 1040 sends it to the channel.
No warranty prompt at the POS because the warranty item isn't assorted to the channel or the group doesn't include the channel. Warranties also only apply to serialized products.
Solution architect
5Design impact
Can it be undone
Reversible: Edit and republish the group, then run job 1040. Warranty policies already sold are not changed. Microsoft Learn
Technical architect
6Technical
Menu item
WarrantyGroupsChecked in Dynamics 365
Form
WarrantyGroupsChecked in Dynamics 365
Table
WarrantyGroupHeaderShown as “WARRANTY GROUP HEADER” in Record infoKey field: GroupNameChecked in Dynamics 365
Data entities
WarrantyGroupHeaderEntityWarranty group header Checked in Dynamics 365
Who can open it
PrivilegesMaintain warranty groups WarrantyGroupsMaintainView warranty groups WarrantyGroupsViewDutiesInquire into products definition master EcoResProductDefinitionMasterInquireMaintain products definition master EcoResProductDefinitionMasterMaintain8 security rolesProduct designer BOMProductDesignerMaterials manager InventMaterialsManagerQuality control manager InventQualityControlManagerBuying agent TradeBuyingAgentPurchasing manager TradePurchasingManagerPurchasing agent VendPurchasingAgentPurchasing Agent - Public Sector VendPurchasingAgent_PSNWarehouse manager WMSWarehouseManagerChecked in Dynamics 365
Roles to set it up and use it
To set it up or change itProduct designer BOMProductDesignerTo use itMaterials manager InventMaterialsManagerWarehouse manager WMSWarehouseManagerPurchasing manager TradePurchasingManagerPurchasing agent VendPurchasingAgentQuality control manager InventQualityControlManagerGive people one of these roles. On this system, 8 roles can open this page.Checked in Dynamics 365
Actions on the page
(Action Pane without tabs): Publish, RevertChecked in Dynamics 365
Developer
7Developer
Open it by URL
https://<your-environment>/?mi=WarrantyGroups
Integrate with
WarrantyGroupHeaderEntity data entity Checked in Dynamics 365