PAGE GUIDEWhat the page does and how to use it7 sections. Choose a role to highlight what matters to you.
Everyone
1What it is and why
What it is
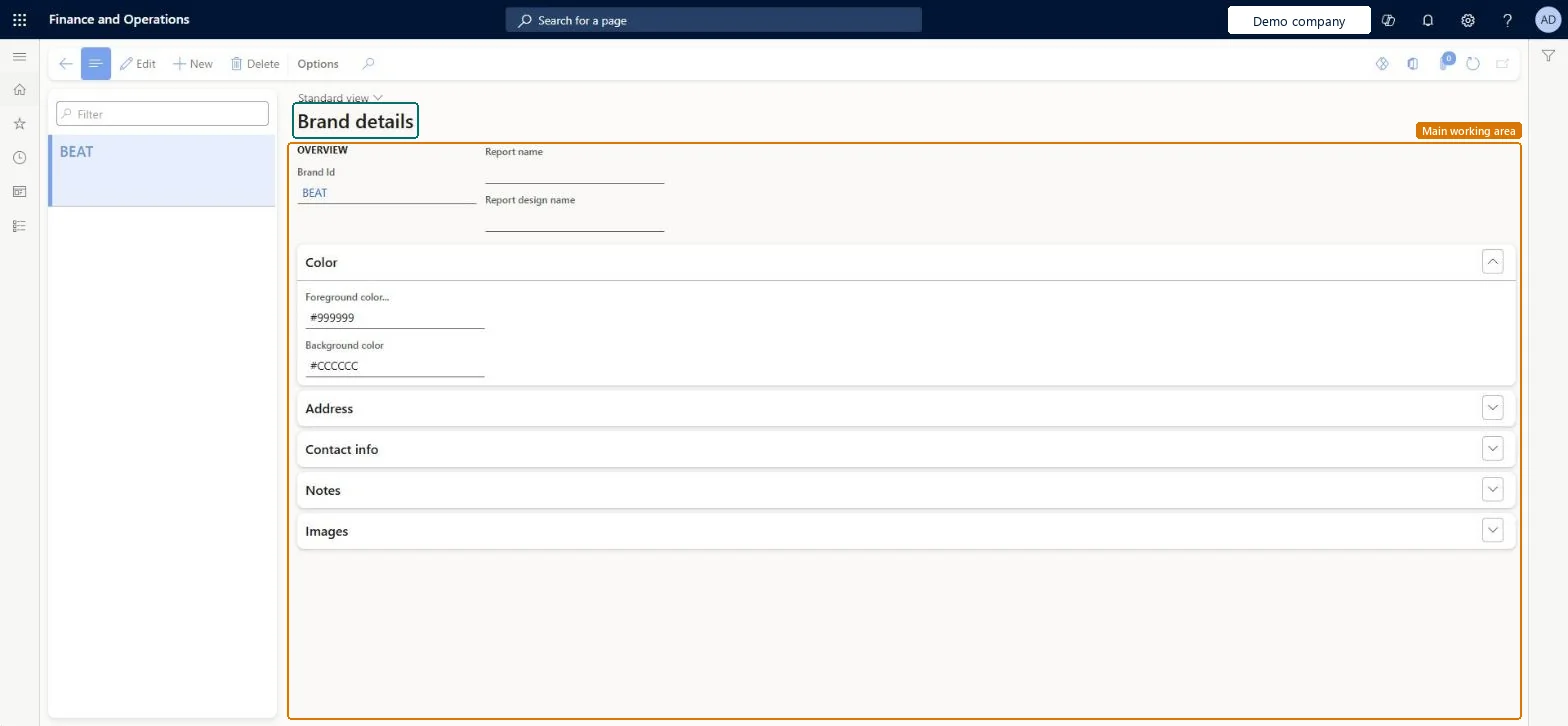
A setup page that holds the details of each document brand: report and design names, colours, address, contact information, notes and images.
What you do here
Use this page to maintain the details that are used for a document brand. For the selected brand you set the Report name, Report design name, Foreground color and Background color, and you maintain the Address, Contact info, Notes and Images sections.
The page in Dynamics 365. page title tab to open what to set or check
About the examples: Examples and screenshots in this guide use BEAT, a demo company in a Dynamics 365 test environment. Use your own company's codes and values instead of copying them.
Step by step, with screenshots
Set up Branding details1 screen
Screen 1
Check the brand details
Go to Organization administration > Setup > Document branding > Branding details
Select the brand in the list
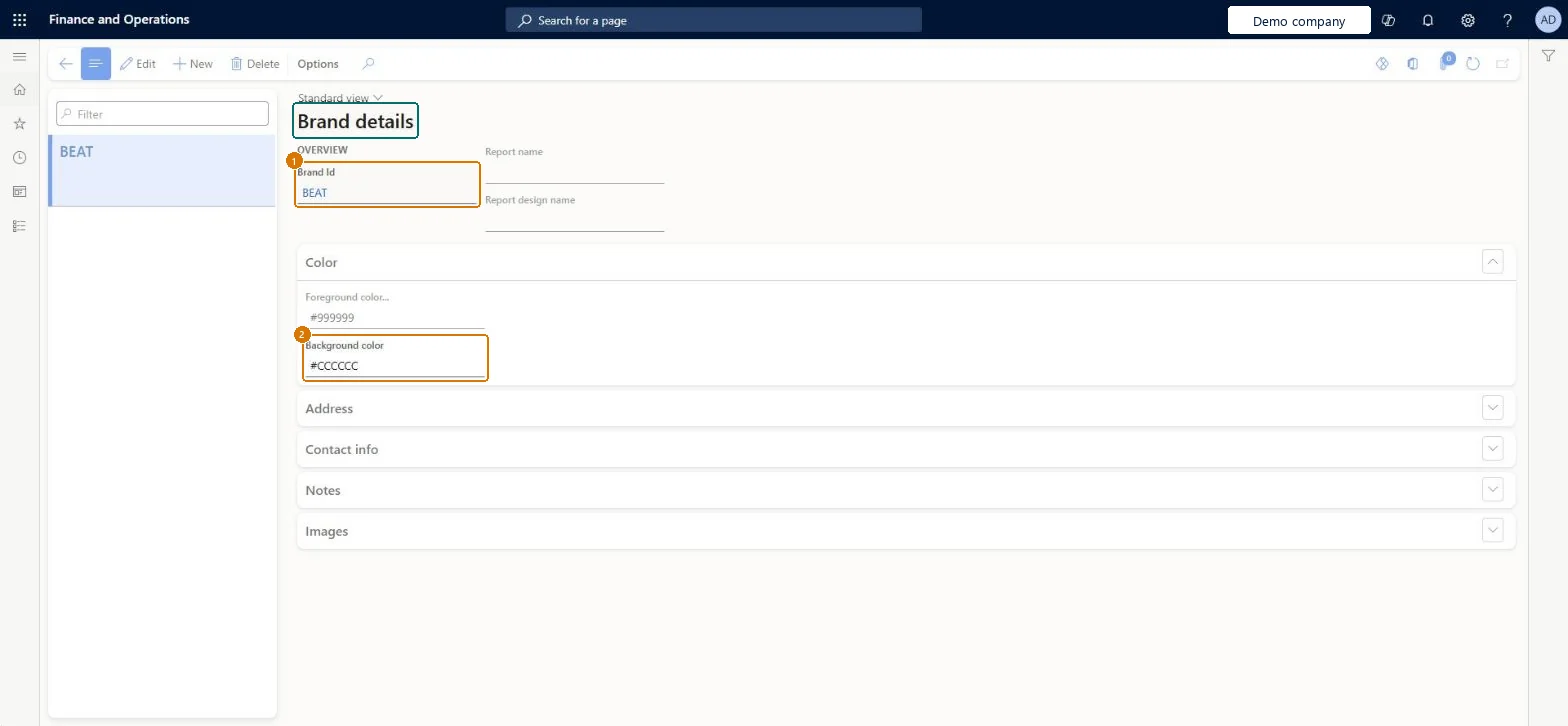
Check the colors used on branded documents
Expand Address, Contact info and Images to check what prints
1Brand Id
BEAT
2Background color
#CCCCCC
Foreground color
#999999
Show the full screen page title tab to open what to set or check
How to use it
Go to Organization administration > Setup > Document branding > Branding details.
Select a brand in the list on the left, then select Edit, or select New to add a brand.
Enter the Report name and Report design name.
Under Color, enter the Foreground color and Background color.
Expand the Address, Contact info, Notes and Images sections to fill in more details.
Source: Checked in Dynamics 365
Fields on the page
Field
What it means
Example
Table column
Brand Id
The ID of the document brand that the details belong to.Checked in Dynamics 365
SysDocuBrandDetailsShown as “Document Branding” in Record infoChecked in Dynamics 365
Who can open it
PrivilegesSysDocuBrandMaintainDutiesSysDocuBrandMaintain1 security roleSystem document branding administrator SysDocuBrandAdminChecked in Dynamics 365
Roles to set it up and use it
To set it up or change itSystem document branding administrator SysDocuBrandAdminGive people one of these roles. On this system, 1 role can open this page.Checked in Dynamics 365
Actions on the page
Options: Personalize, Page options, ShareChecked in Dynamics 365
Checked in a working Dynamics 365 system, version 10.0.49: the menu item, form, table and security, the page, the demo records and the values in the screenshots.